Not-Quite-Genoise: Lemon Edition
A bright and friendly sponge cake that flirts with finesse but won’t judge your folding technique.

A soft, citrus-scented sponge with a little lift and a lot of charm.
If classic genoise is the elegant older sister who trained in Paris and expects you to hold a whisk just so, this cake is her sunny younger cousin—just as graceful in the end, but far more forgiving along the way...
Why I Love This Sponge
This one has quickly become a go-to in my kitchen. The texture is beautifully soft and spongy, with just a hint of bright citrus that lifts any filling you pair with it. It absorbs syrup like a dream, stays tender after chilling, and holds up to gentle carving—perfect for creative layer cakes and story-driven bakes.
Casting This Sponge in New Stories
This lemon sponge may look humble, but don’t be fooled—she’s already lining up roles like she’s got an agent.
Upcoming appearances include:
– A lemon-strawberry fantasy dress cake for my niece’s birthday, complete with a whimsical skirt inspired by enchanted forest mushrooms
– A floating-layer fairy tale cake inspired by the charming story, The Light Princess
– And possibly a cameo in a spring entremet, if we’re feeling extra fancy
This tasty cake is soft, spongy, and always down to support a story. Consider it the dependable best friend in every great dessert plot.
Behind the Batter
From gentle heat to that perfect ribbon stage, here’s a step-by-step peek inside the sponge—and a few friendly tips to help you whip, fold, and bake like a pro.
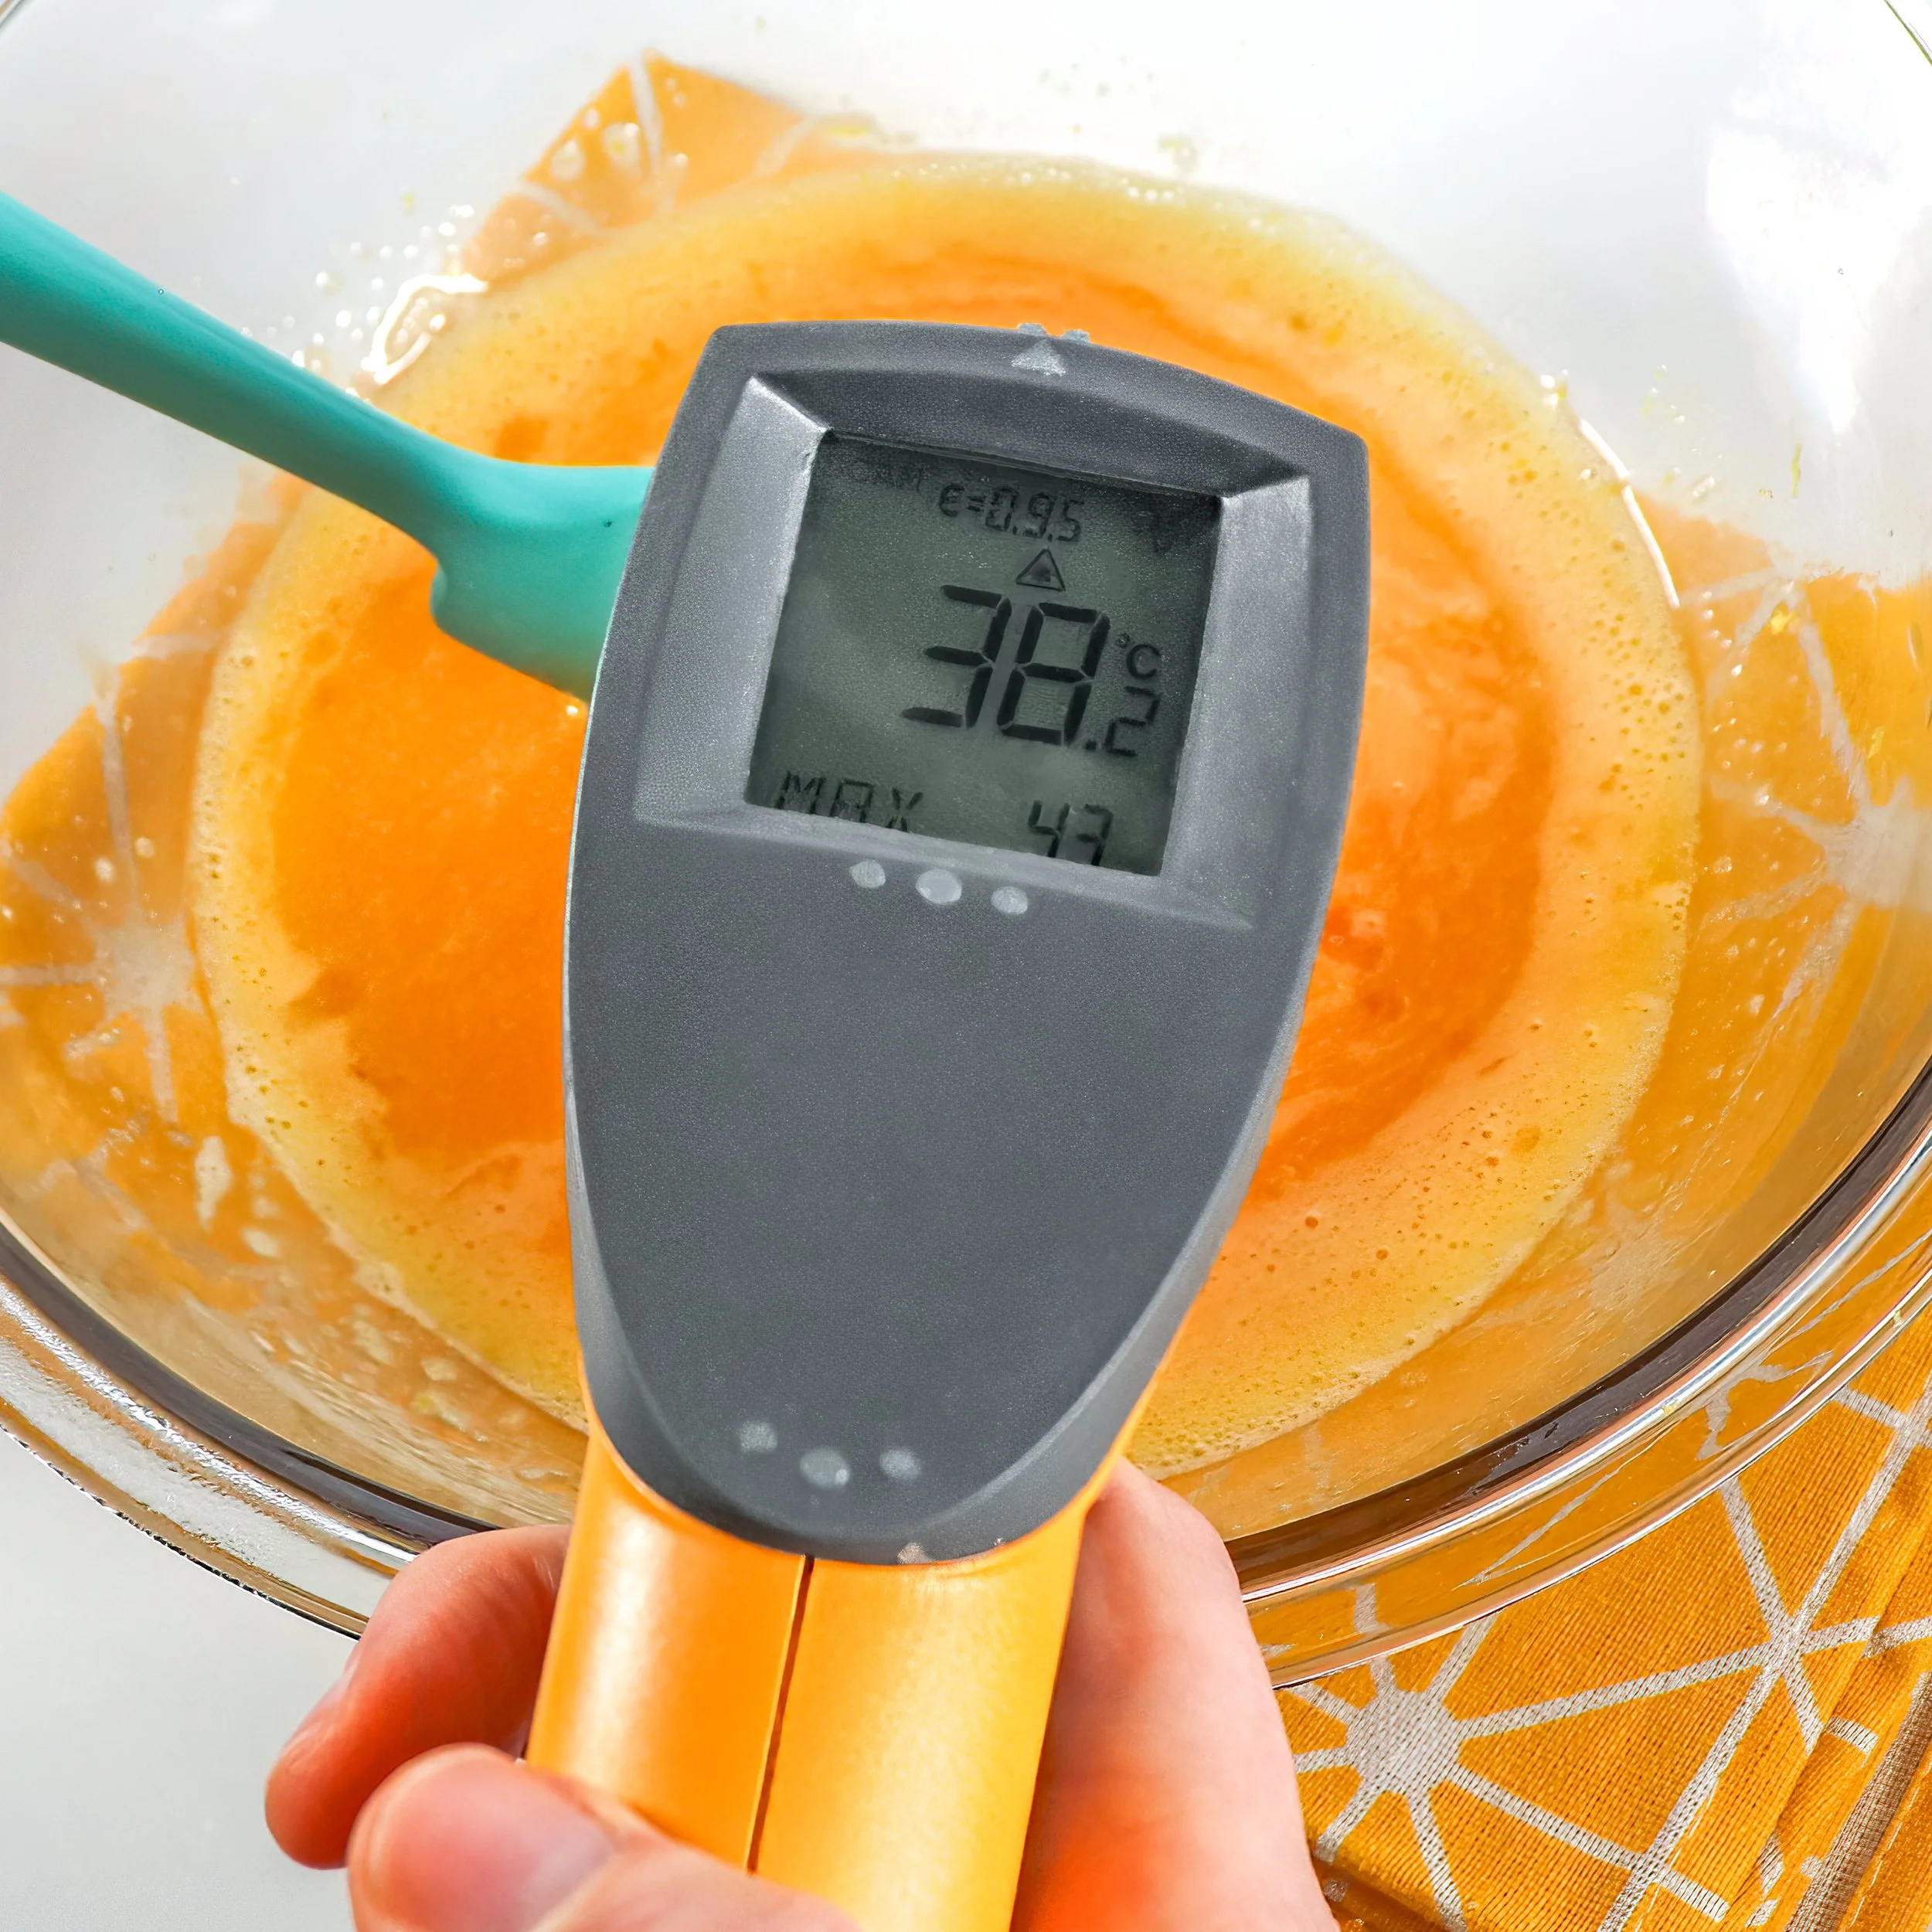
Warming the Eggs
A bain marie helps dissolve the sugar and gives your sponge a head start. I heat to 38–40ºC.
Gently warming the eggs helps build a stable, airy batter. I like to use a laser thermometer for precision and ease.
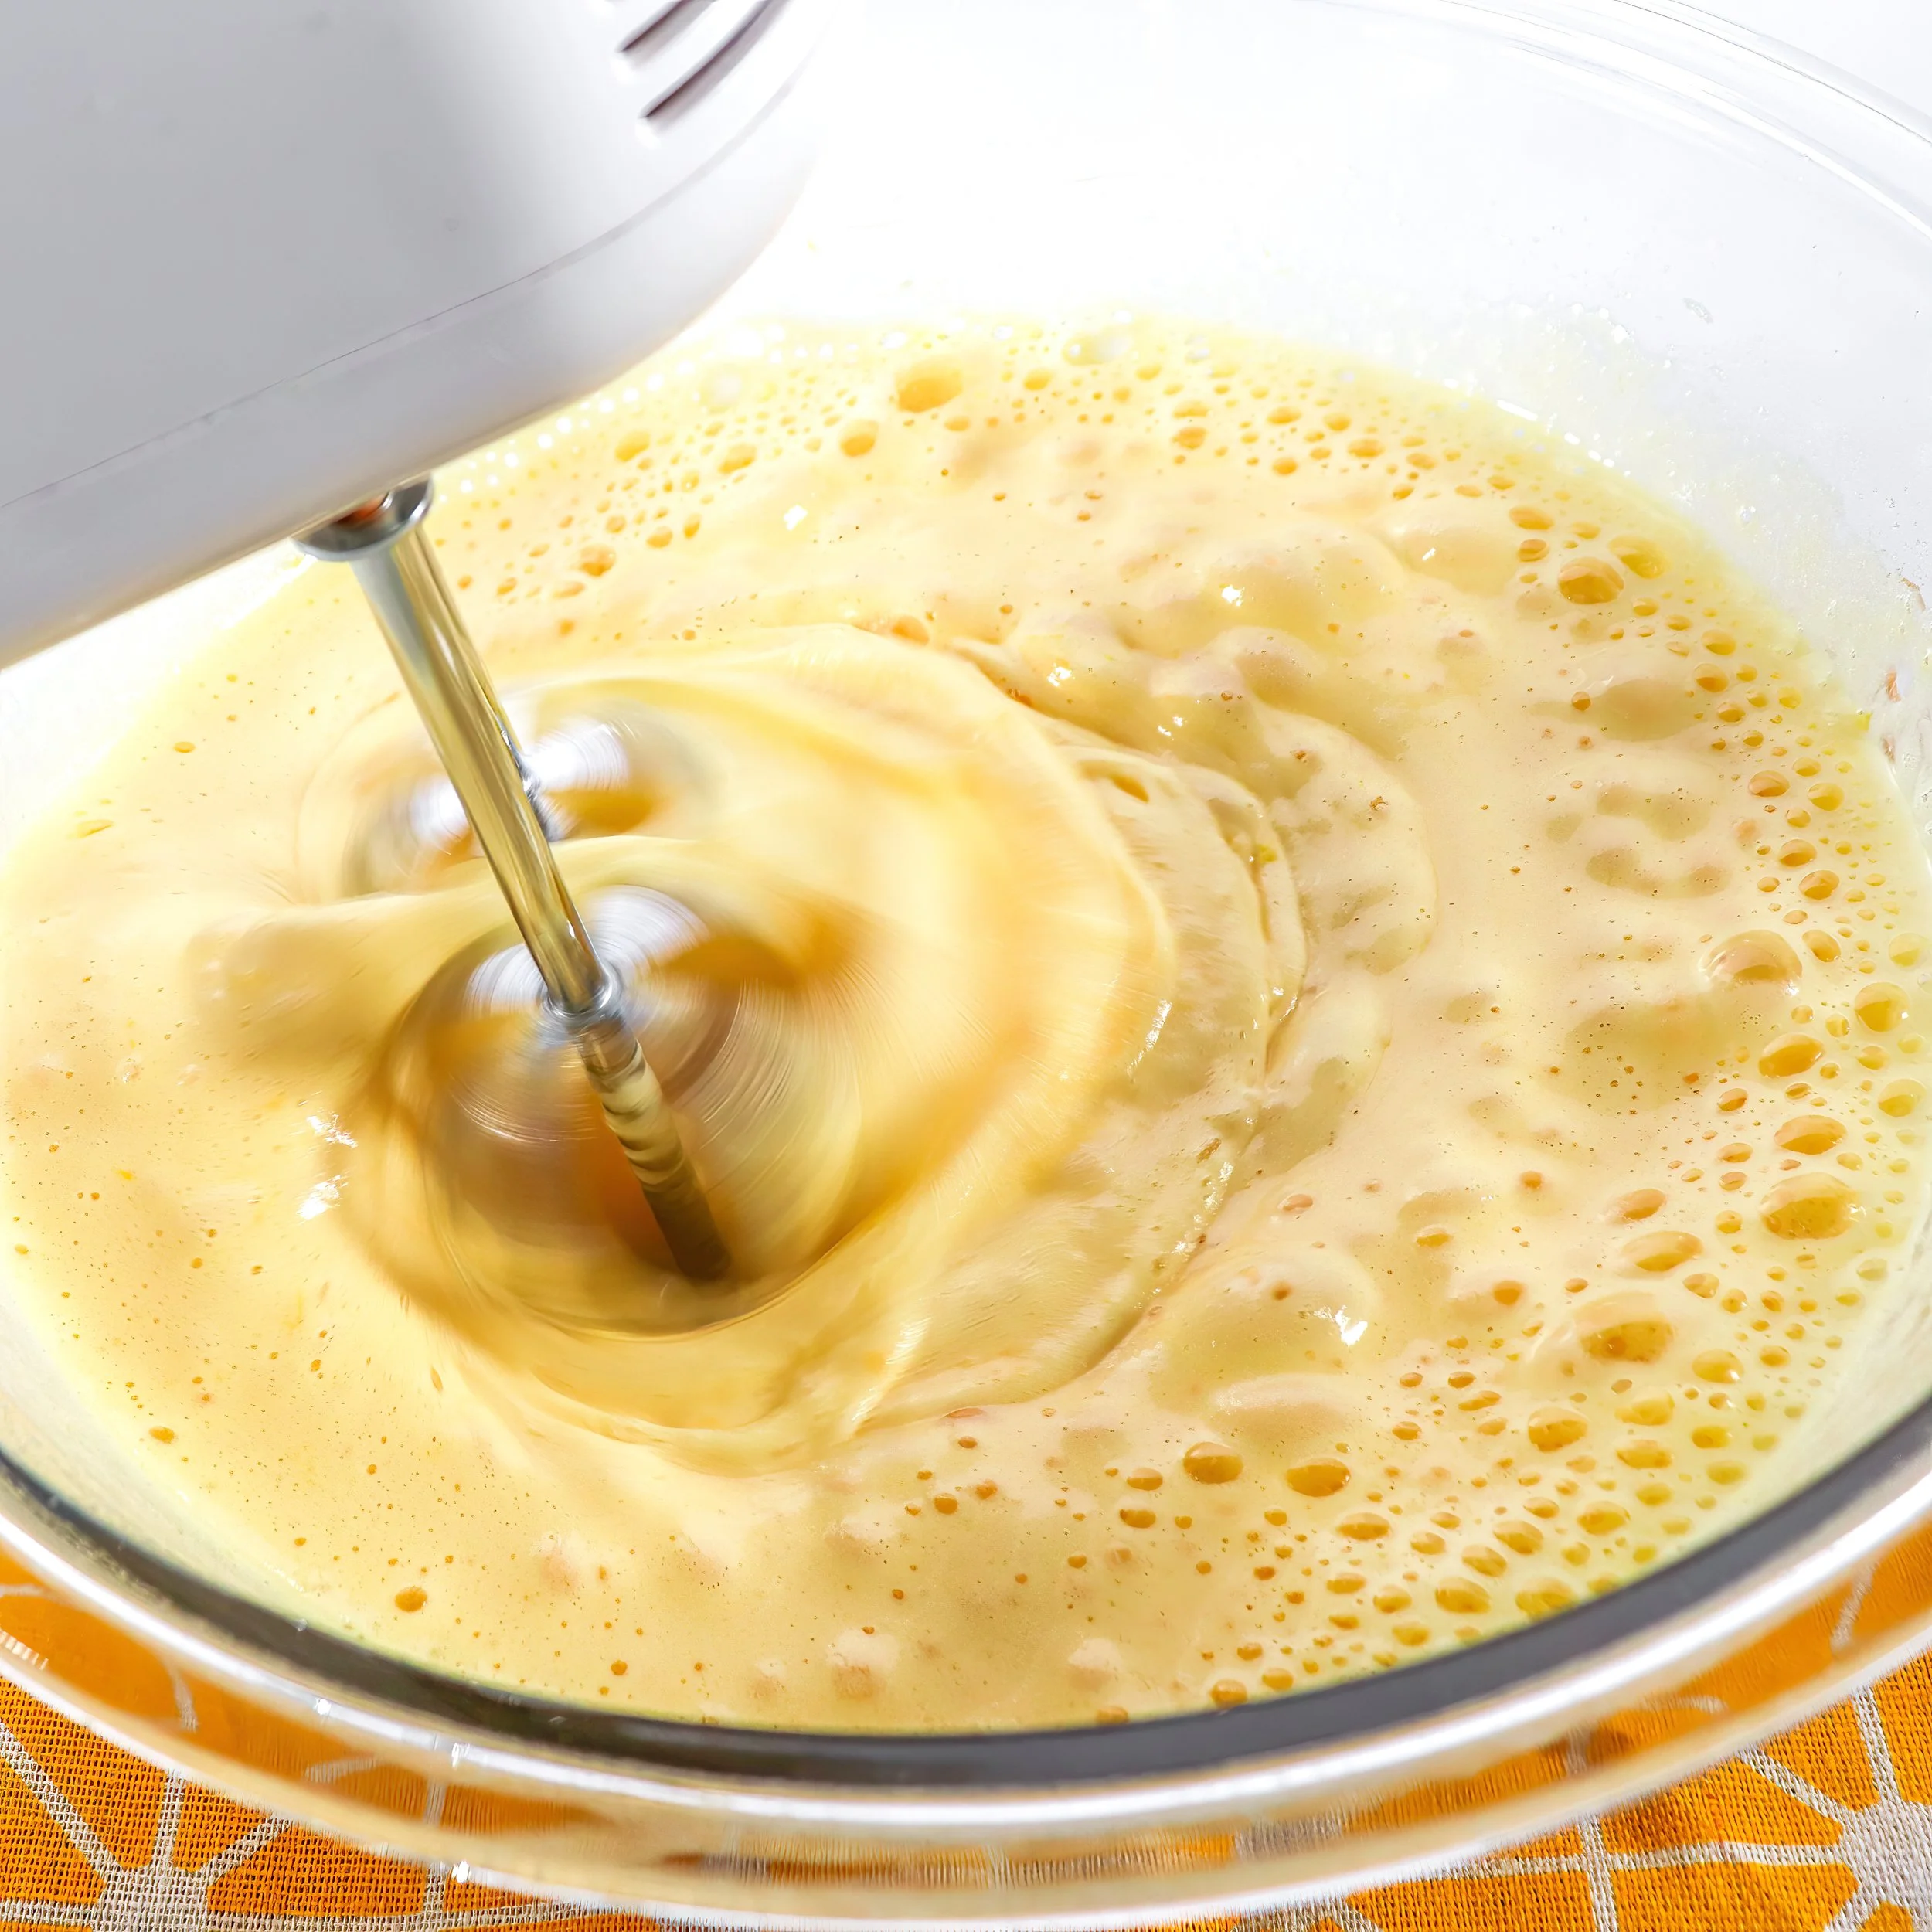
Start Whipping
Once your egg mixture is warmed, begin whipping at high speed. You’re building air and volume from the start—don’t be afraid to let it go for several minutes (usually about 10 minutes for me).
At first, the mixture will look bubbly and loose. Keep going! You’re on your way to magic.

Reaching Ribbon Stage
This is the moment where air becomes structure. The batter should be thick, pale, and fall in slow, disappearing ribbons when lifted.
Ribbon stage means the batter trails slowly off the whisk and sits on the surface for a few seconds before blending in. It should feel fluffy but still fluid.
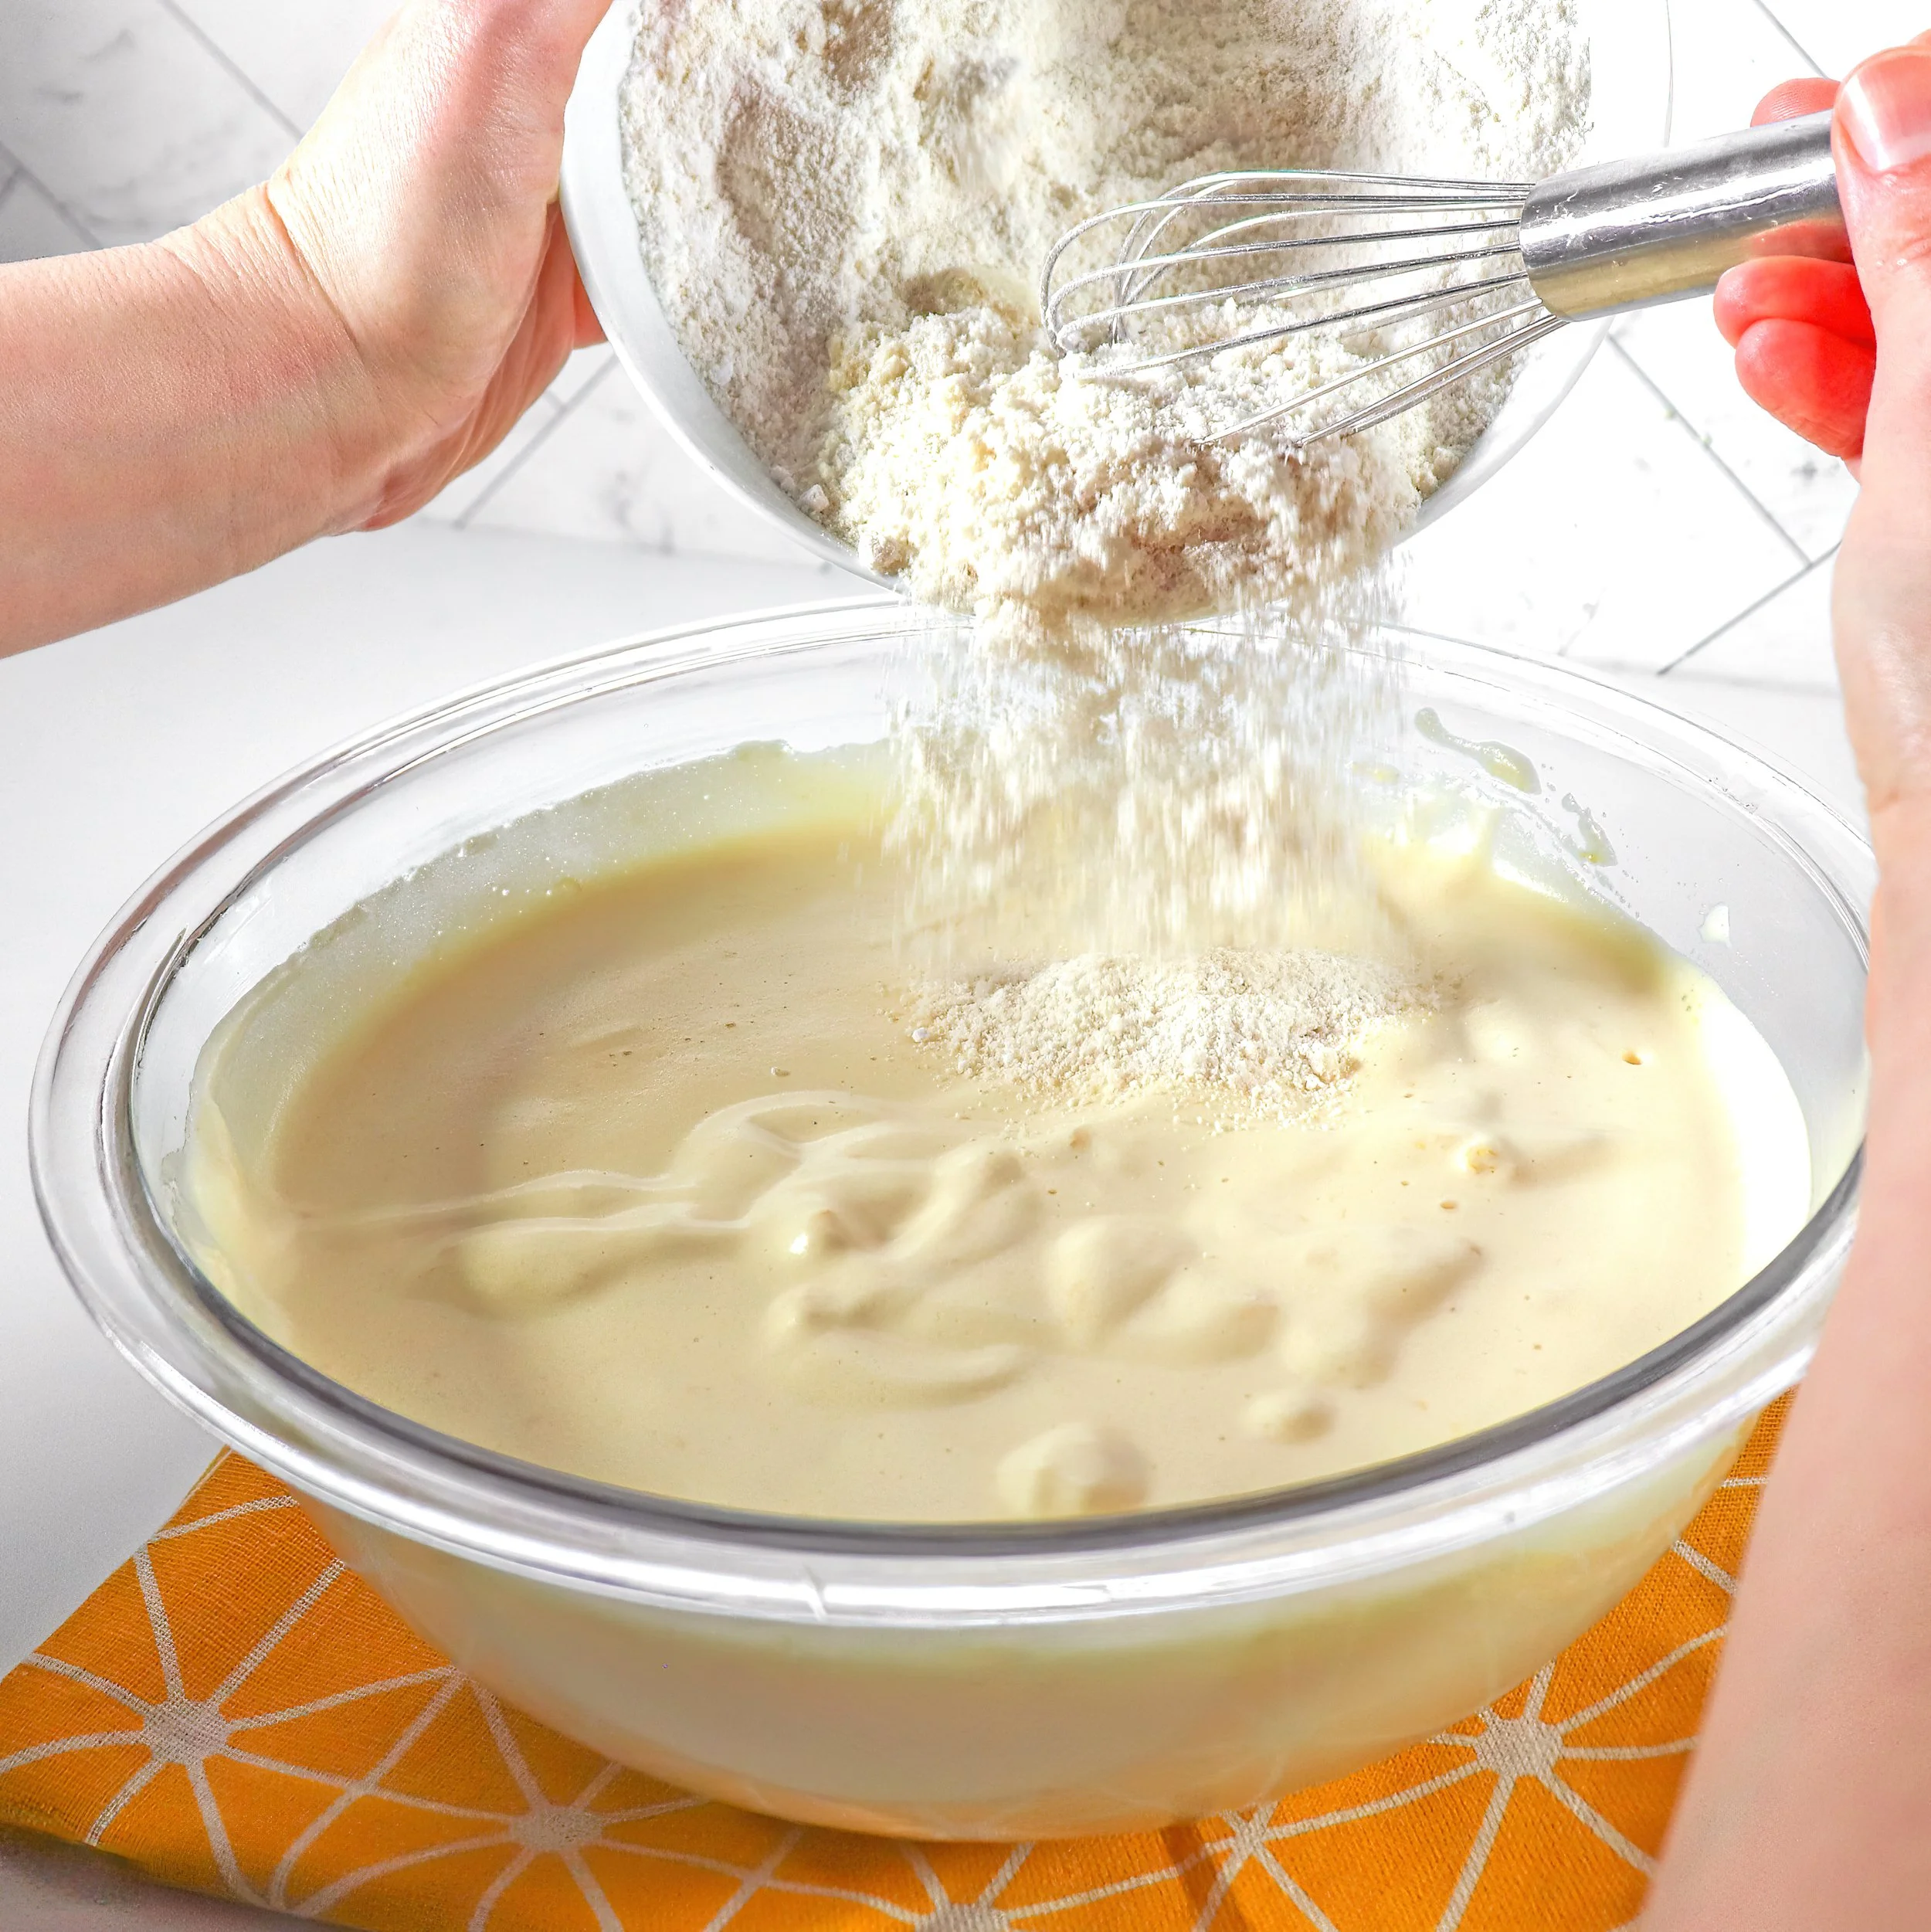
Folding in the Final Ingredients
First the dries, then the milk + oil, folding gently until just combined. Think of it as coaxing the batter into shape—softly, without deflating the story you’ve just built.

Pour & Prepare
Pour the batter into your prepared pan(s), smoothing the surface if needed. Tap each pan firmly on the counter once or twice to release large air bubbles.

Bake to Perfection
Bake at 170ºC (340ºF) for 24–28 minutes, or until the top springs back when lightly touched and a toothpick inserted in the center comes out clean.
Not-Quite-Genoise: Lemon Edition
A soft, citrus-scented sponge with a little lift and a lot of charm.
Yields: One 8" +cake or two 4" cakes (ideal for small layer cakes)
Prep Time: 25 minutes
Bake Time: 24–28 minutes (non-convection oven)
Total Time: ~80-85 minutes
Note: I always recommend baking by weight—it’s the most reliable way to get consistent results, especially with sponges like this one. But if you’re team measuring cup, I’ve got you! These volume conversions are close approximations.
✨ Ingredients
210g whole eggs (about 3 large eggs; weigh for accuracy)
54g tapioca syrup (2 tbsp + 1 tsp)
Zest of 3 lemons (about 1 tbsp packed zest)
95g granulated sugar (just shy of ½ cup – about 7 tbsp)
80g almond flour (¾ cup, lightly spooned and leveled)
90g cake flour (¾ cup, spooned and leveled)
105g heavy cream (scant ½ cup – about 7 tbsp)
2g fine sea salt (just under ½ tsp)
5.1g baking powder (about 1½ tsp)
54g almond oil (just under ¼ cup – about 3 tbsp + 1 tsp)
🥣 Method
1. Preheat Oven
Preheat to 170ºC (340ºF). Line the bottom and sides of the cake pan(s) with parchment. Do not grease the sides.
2. Warm the Egg Mixture
In a heatproof bowl, combine eggs, tapioca syrup, sugar, and lemon zest. Gently warm over a bain-marie or in short microwave bursts until the mixture reaches 38–40ºC (just warm to the touch).
3. Whip to Ribbon Stage
Whip until thick, pale, and tripled in volume. Ribbons should fall from the whisk and slowly dissolve back into the surface.
4. Mix Dry & Wet Bases
In one bowl, whisk together almond flour, baking powder, and salt.
In a separate bowl, combine the heavy cream and almond oil.
5. Fold Gently
Using a large spatula, gently fold the dry ingredients into the egg mixture in two additions. Then fold in the cream/oil mixture until just combined and smooth. Do not over-mix.
6. Bake
Divide the batter evenly between the prepared pans and smooth the tops if needed. Tap each pan firmly on the counter once or twice to release any large air bubbles. Bake for 24–28 minutes, or until the surface springs back to a gentle touch and a toothpick inserted in the center comes out clean.
7. Cool & Unmold
Cool in the pans for 5–10 minutes. Then run a knife around the edges and turn out onto a wire rack. Let cool completely before trimming or layering.
Want to save this one for later?
I’ve put together a printable version of the full recipe—including both grams and U.S. volume measurements—for easy reference in the kitchen.
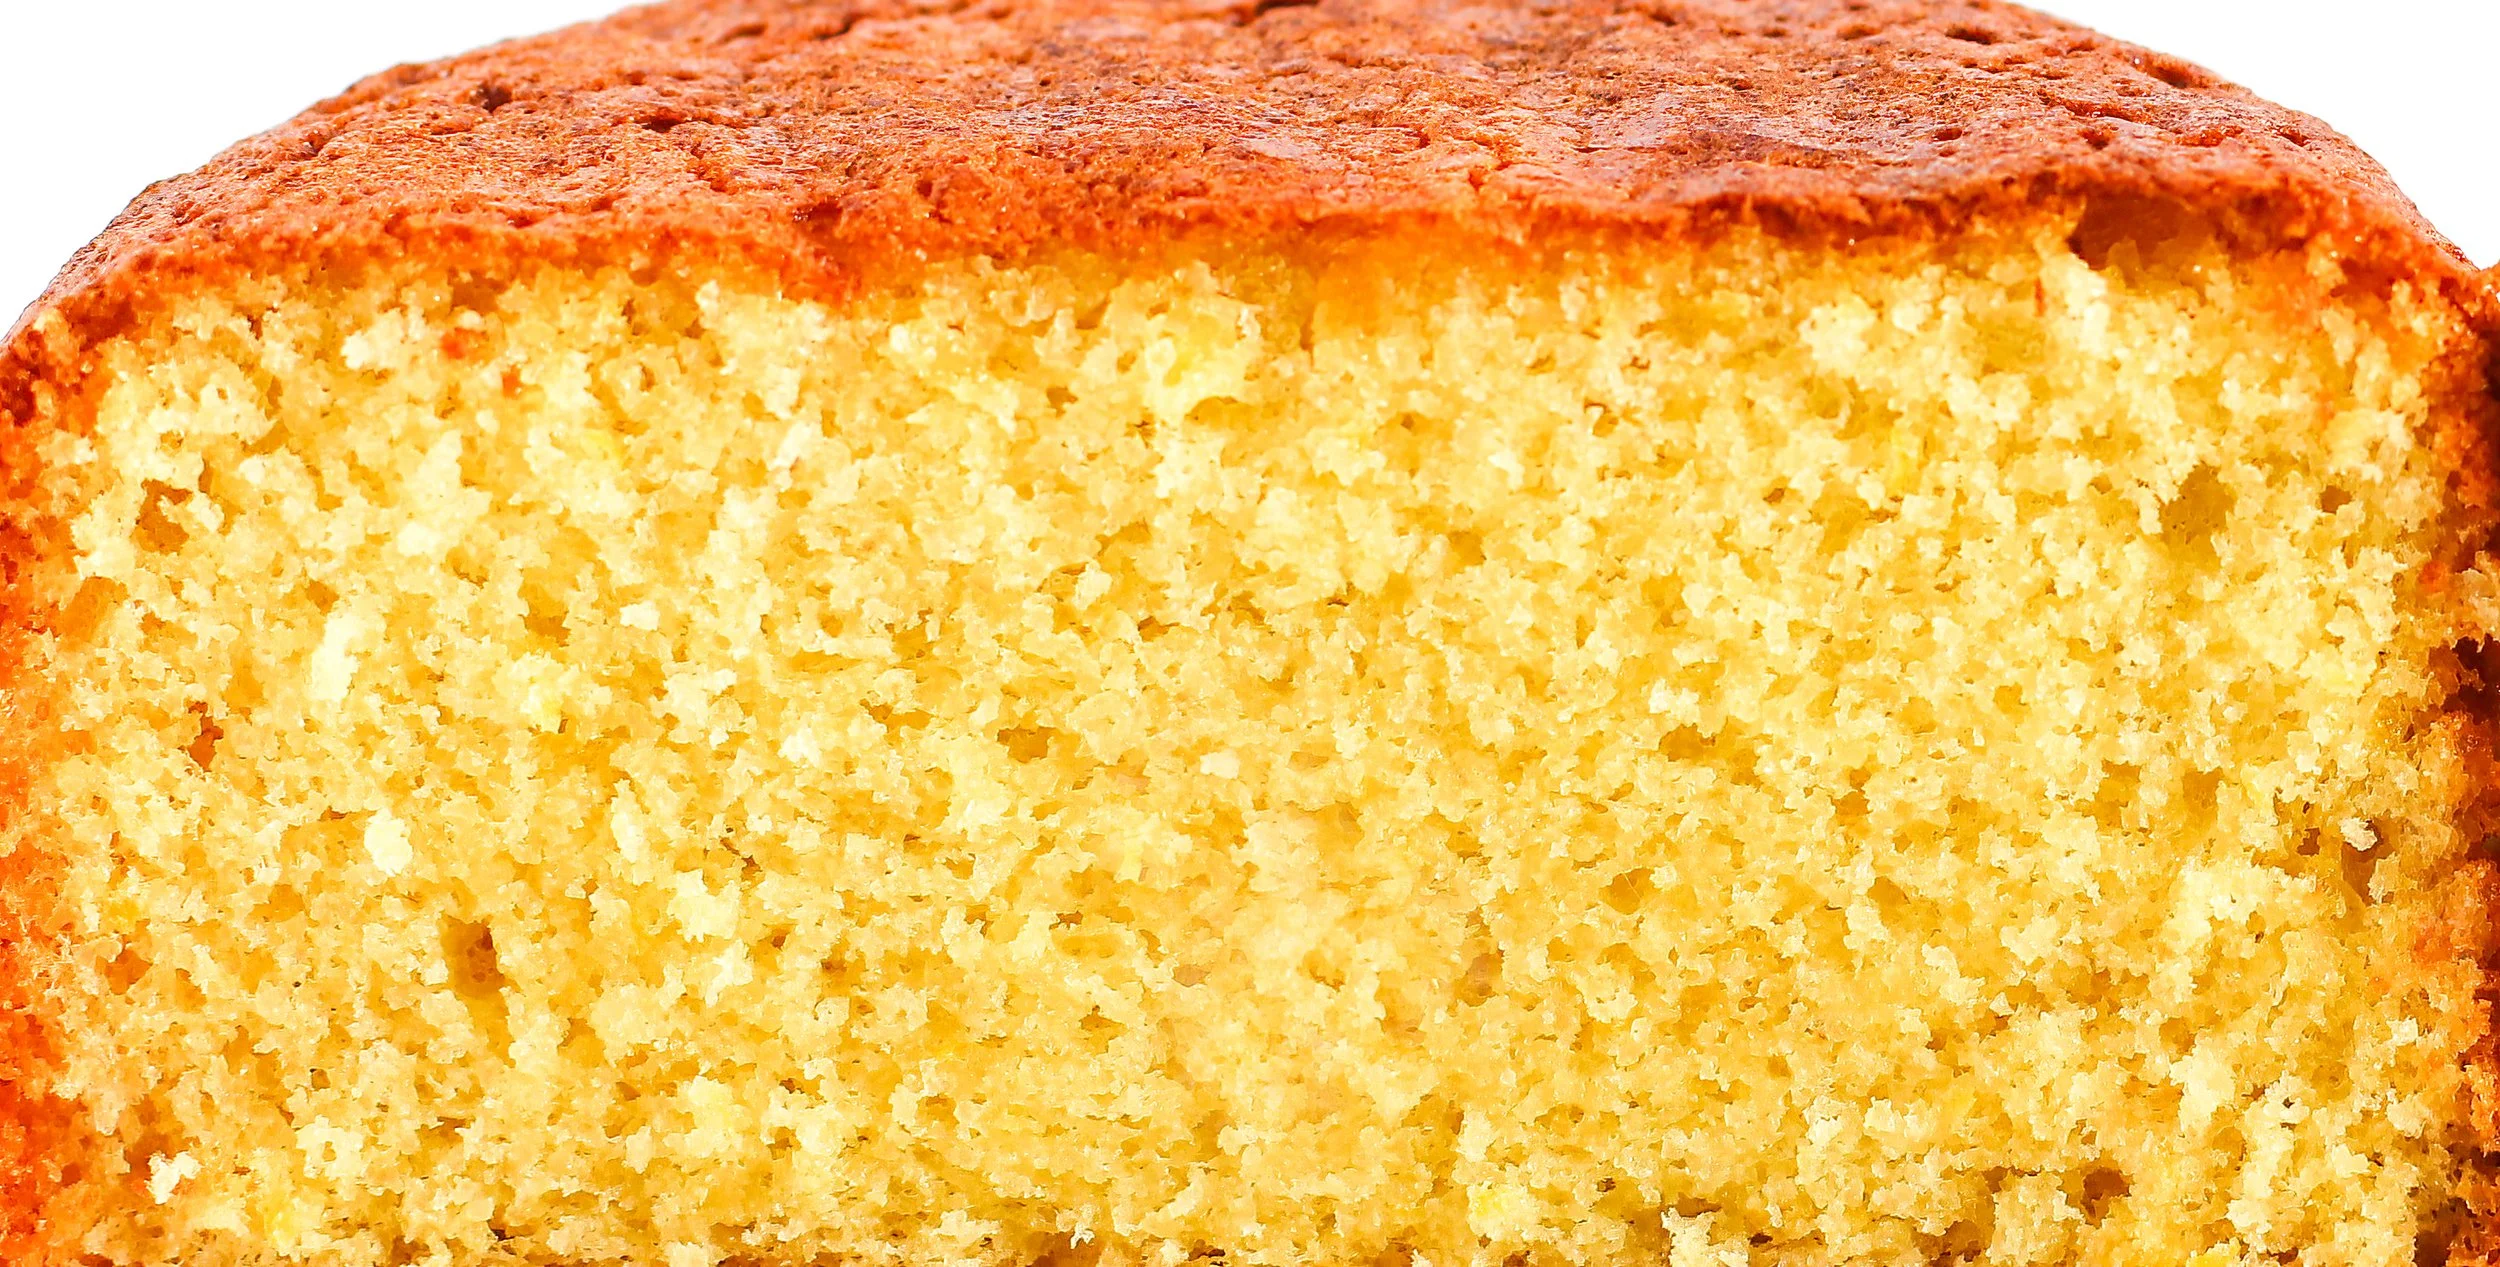
A tender, citrus-scented crumb with a soft, springy texture—this sponge bakes up beautifully light and versatile.
Whether you’re baking it into a storybook birthday cake or layering it with lemon curd for something simple and sweet, I hope this not-quite-genoise—our friendly cousin to that very proper sponge—earns a spot in your recipe rotation.
If you give it a try, tag me @inspiredtotaste so I can cheer you on!