Saturday Morning Cereal Tarts
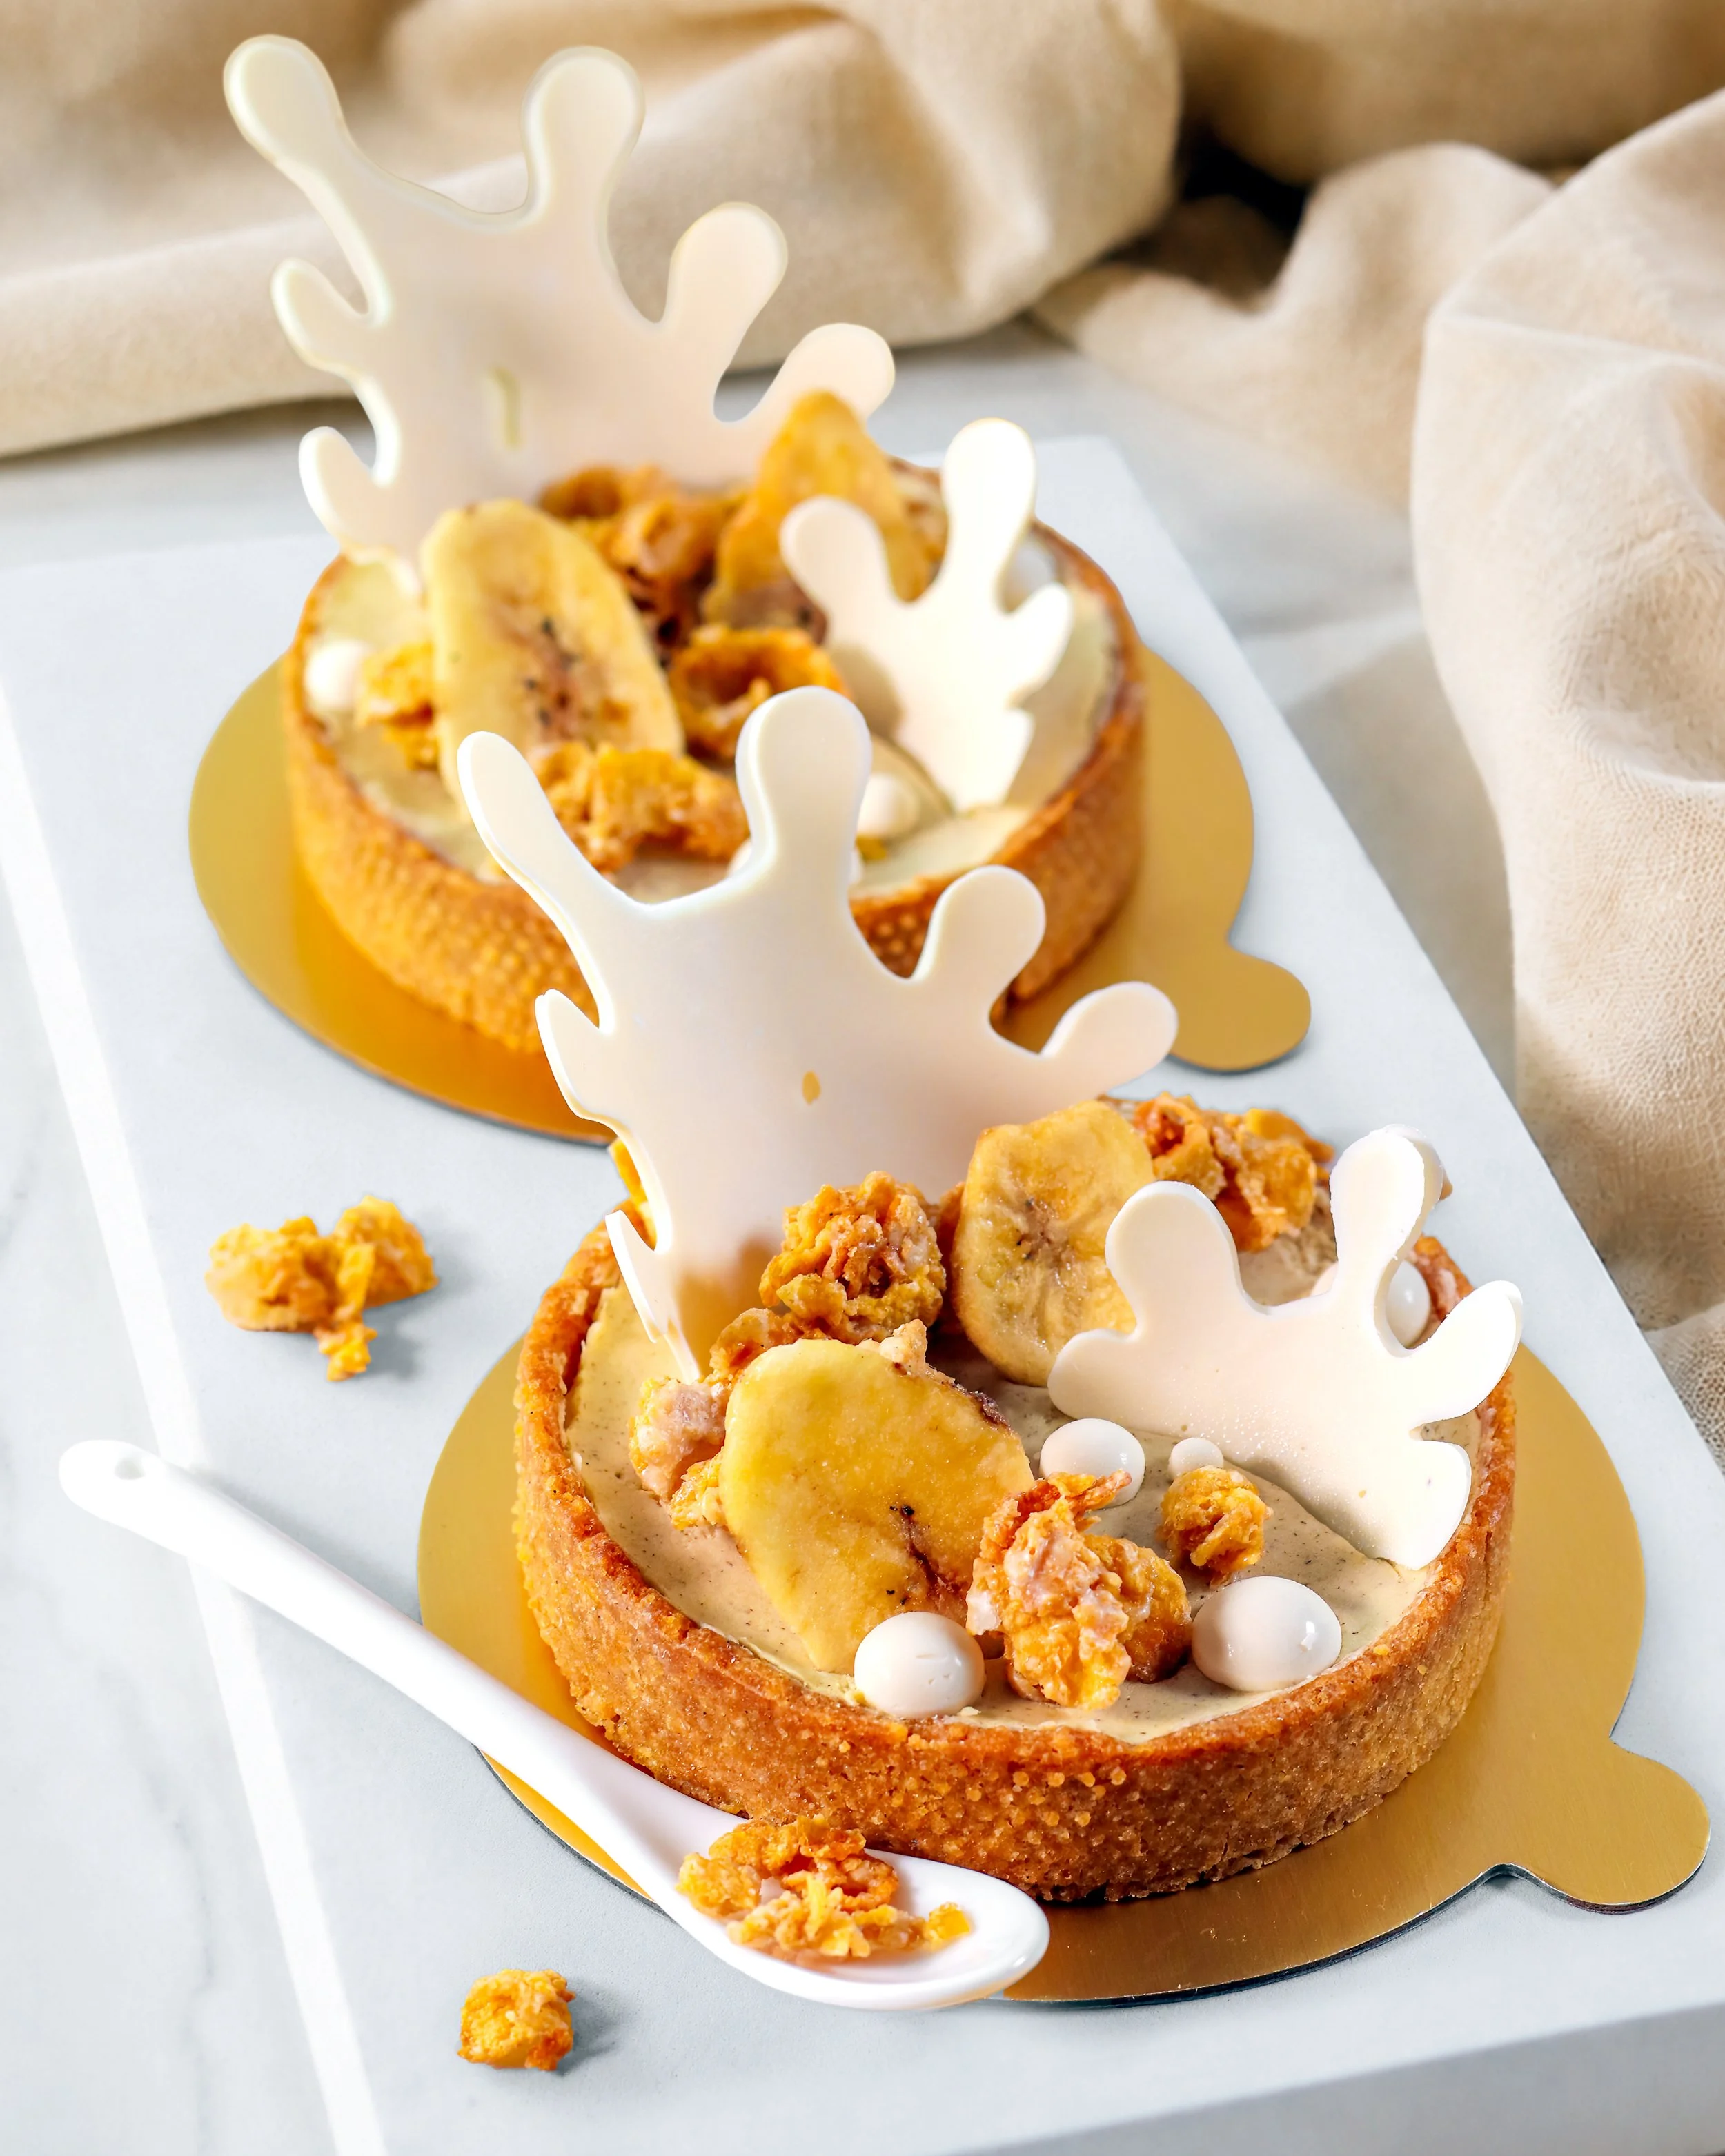
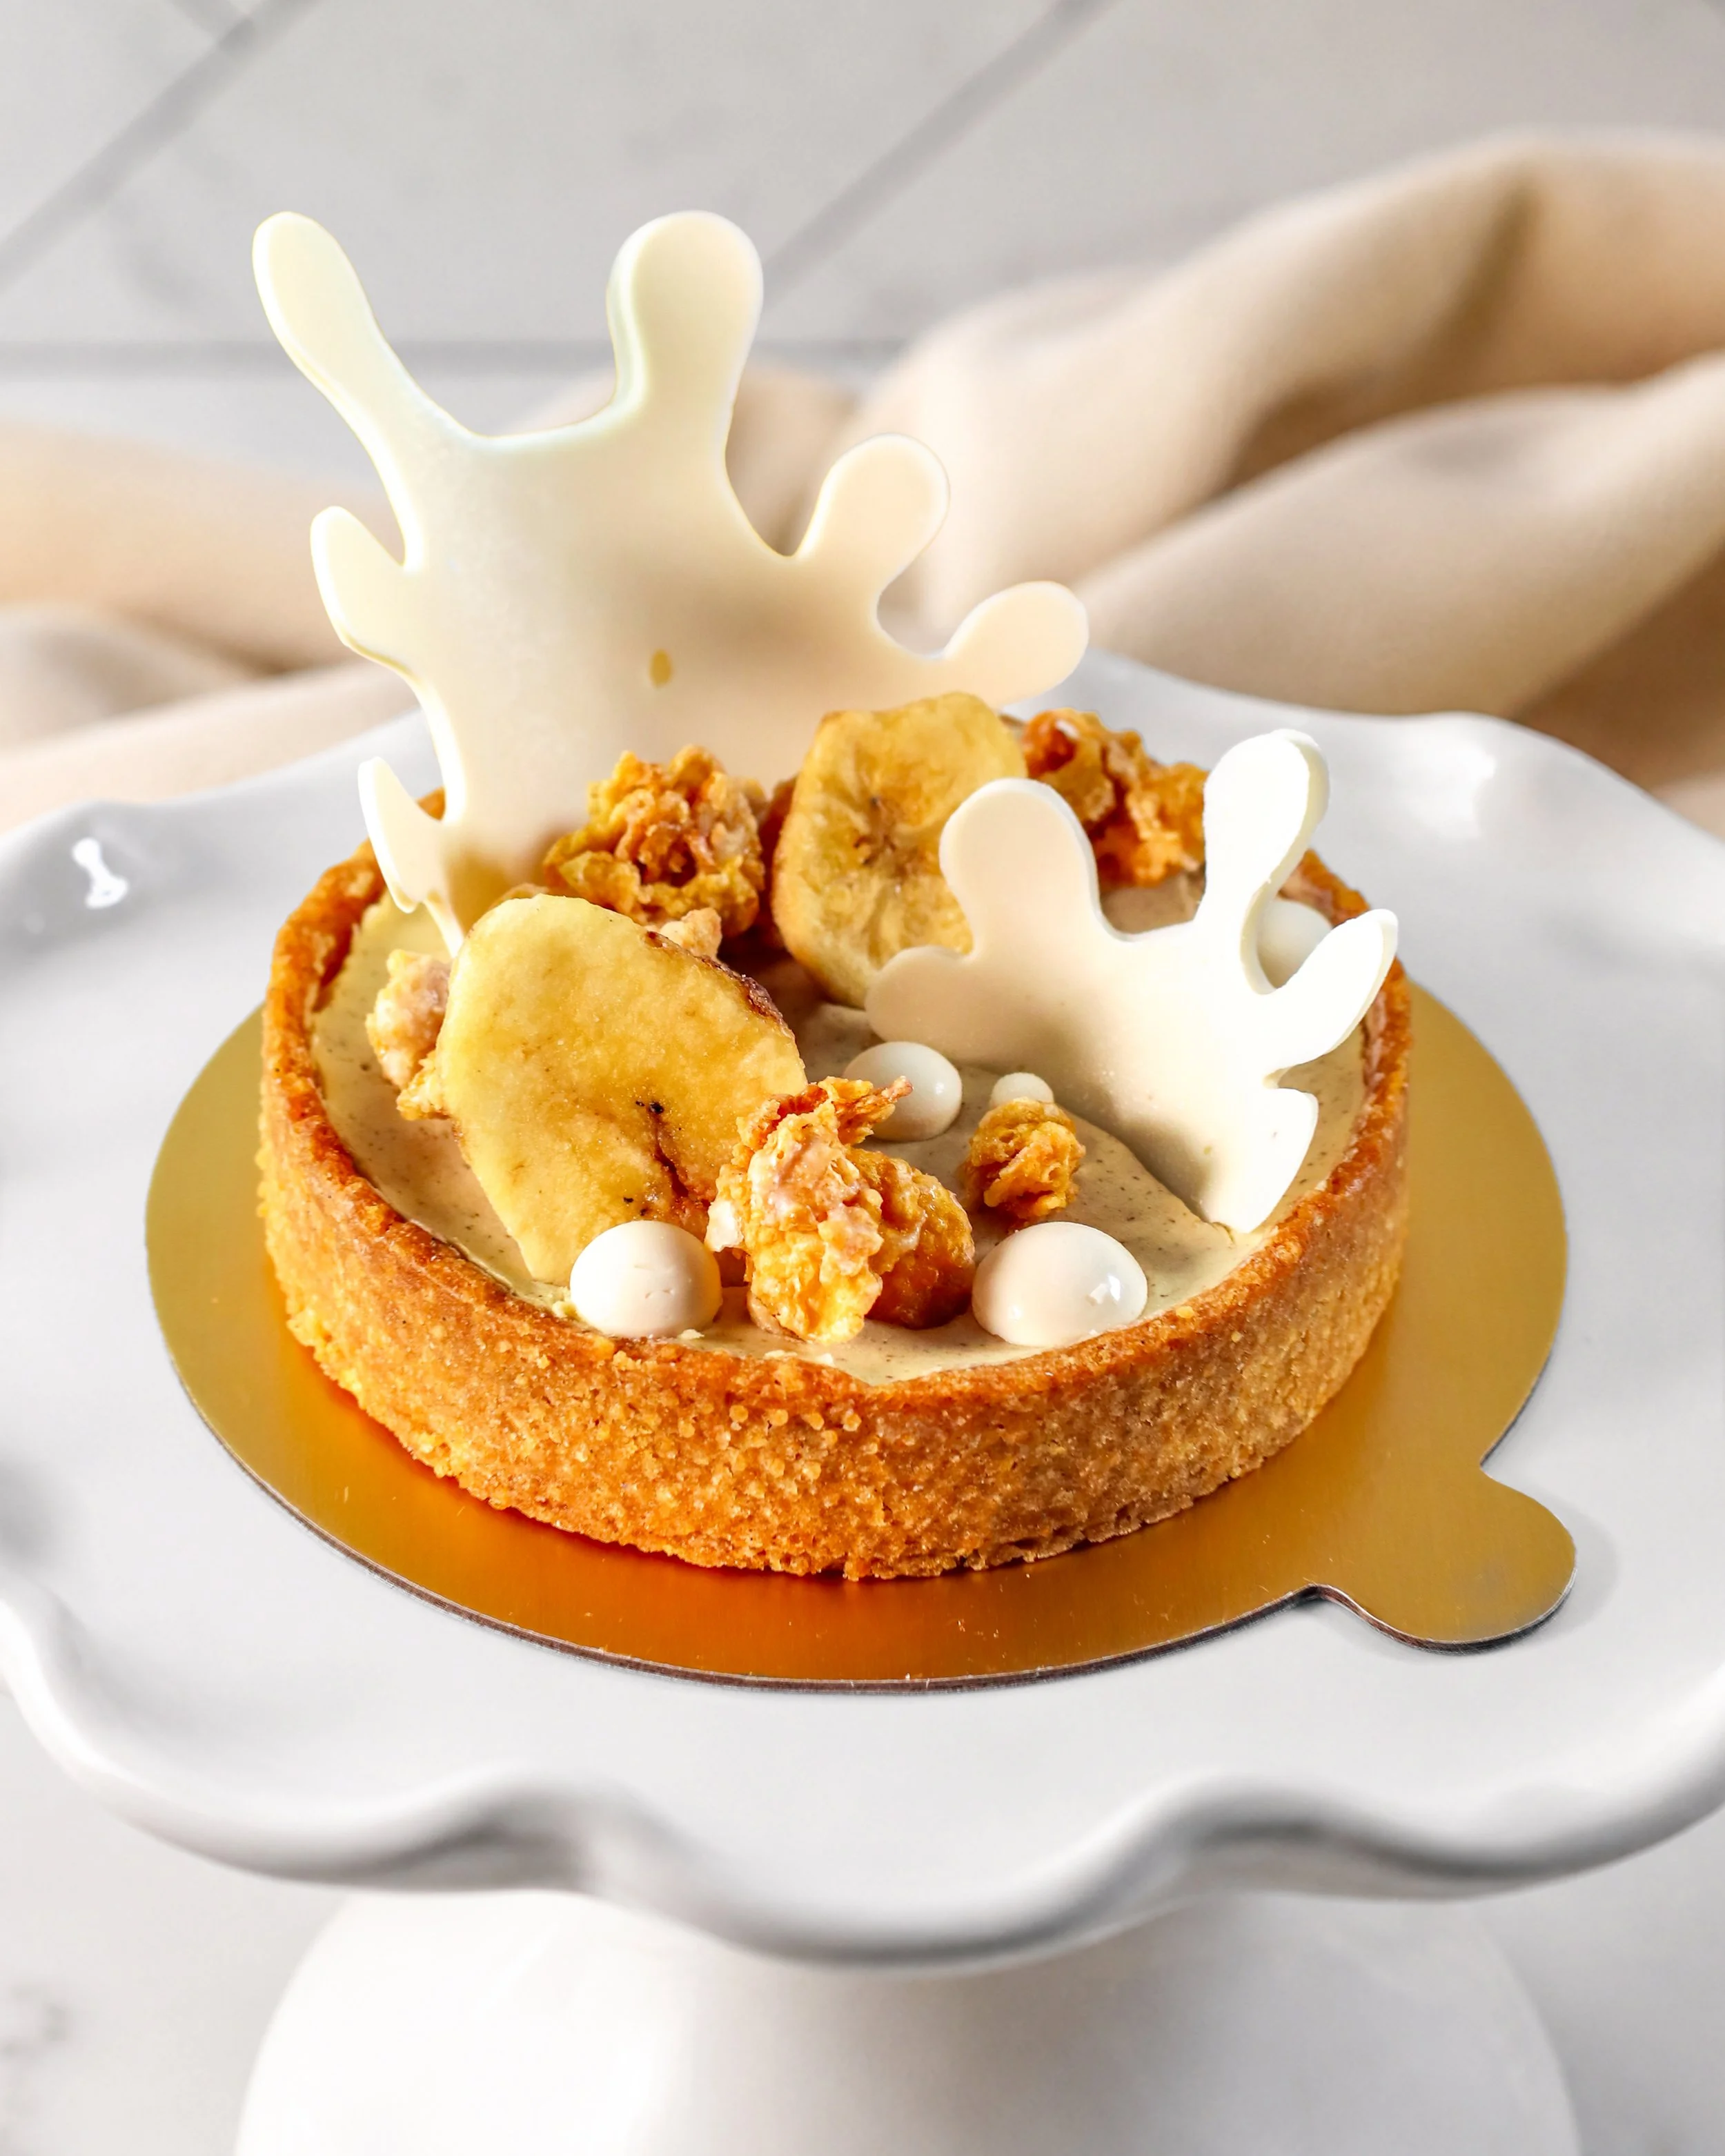
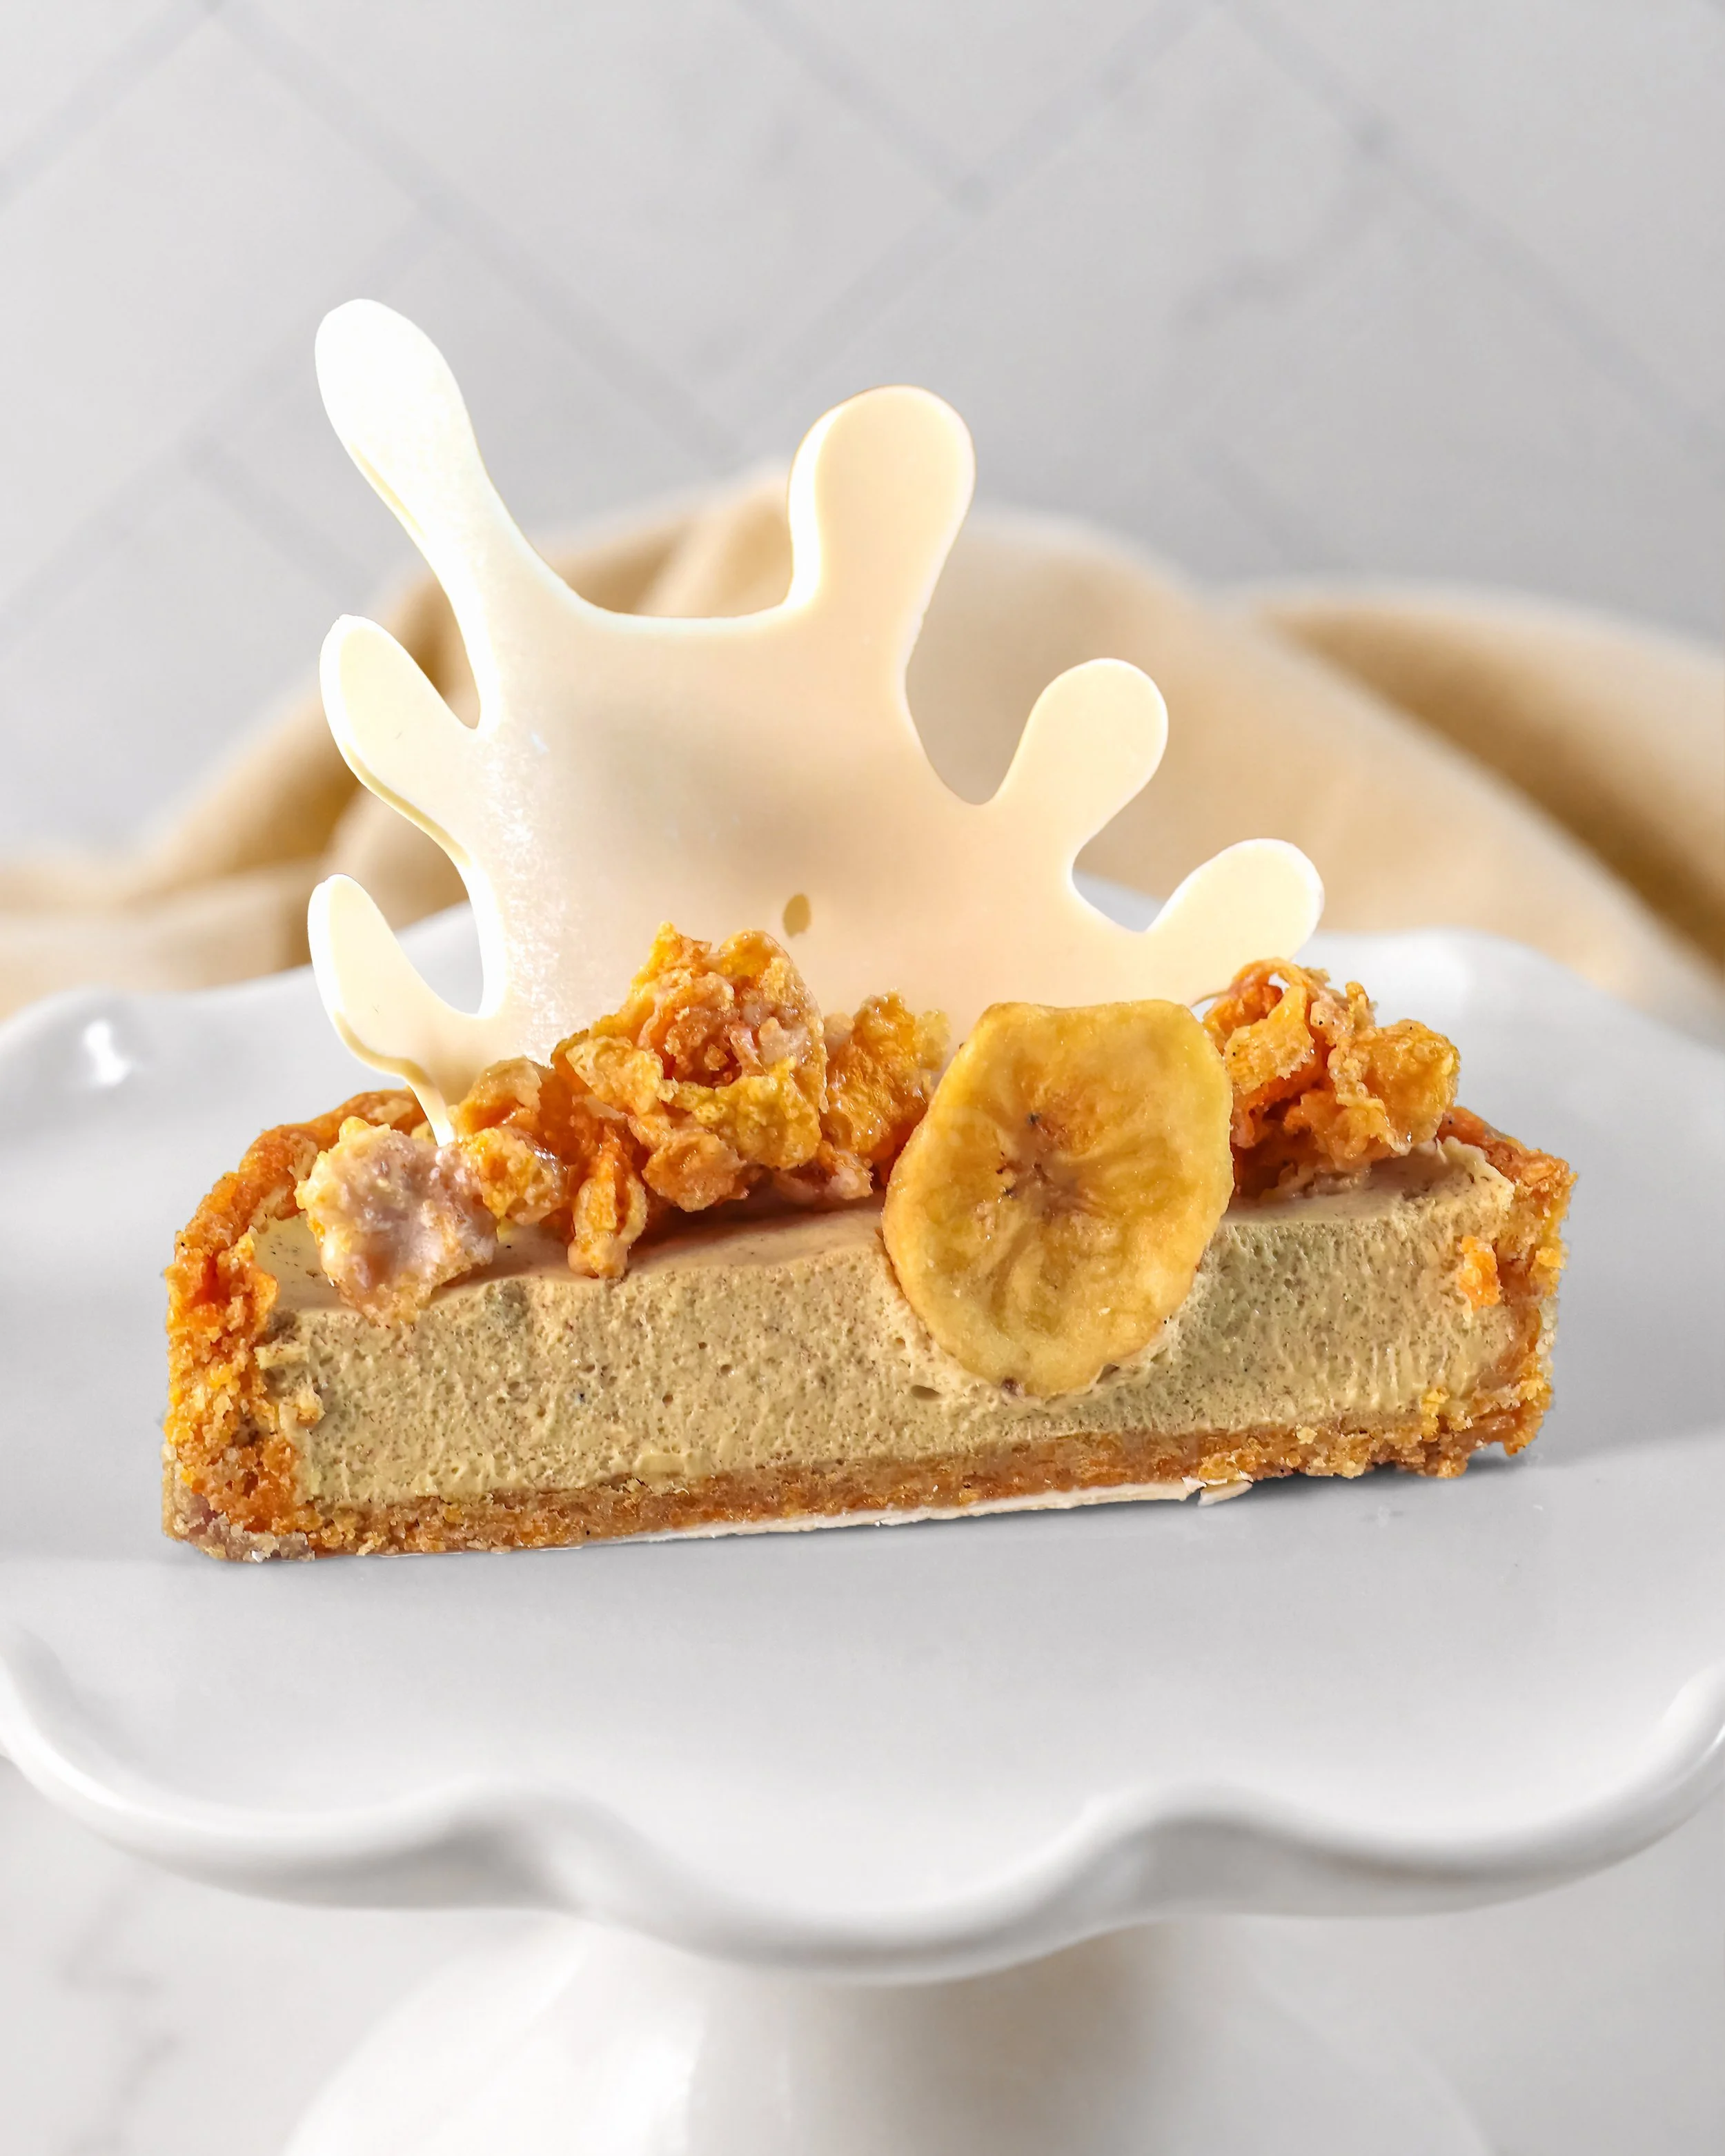
Banana cereal-milk mousse in a malted cornflake crust, topped with caramel cornflake clusters and white-chocolate milk splashes.
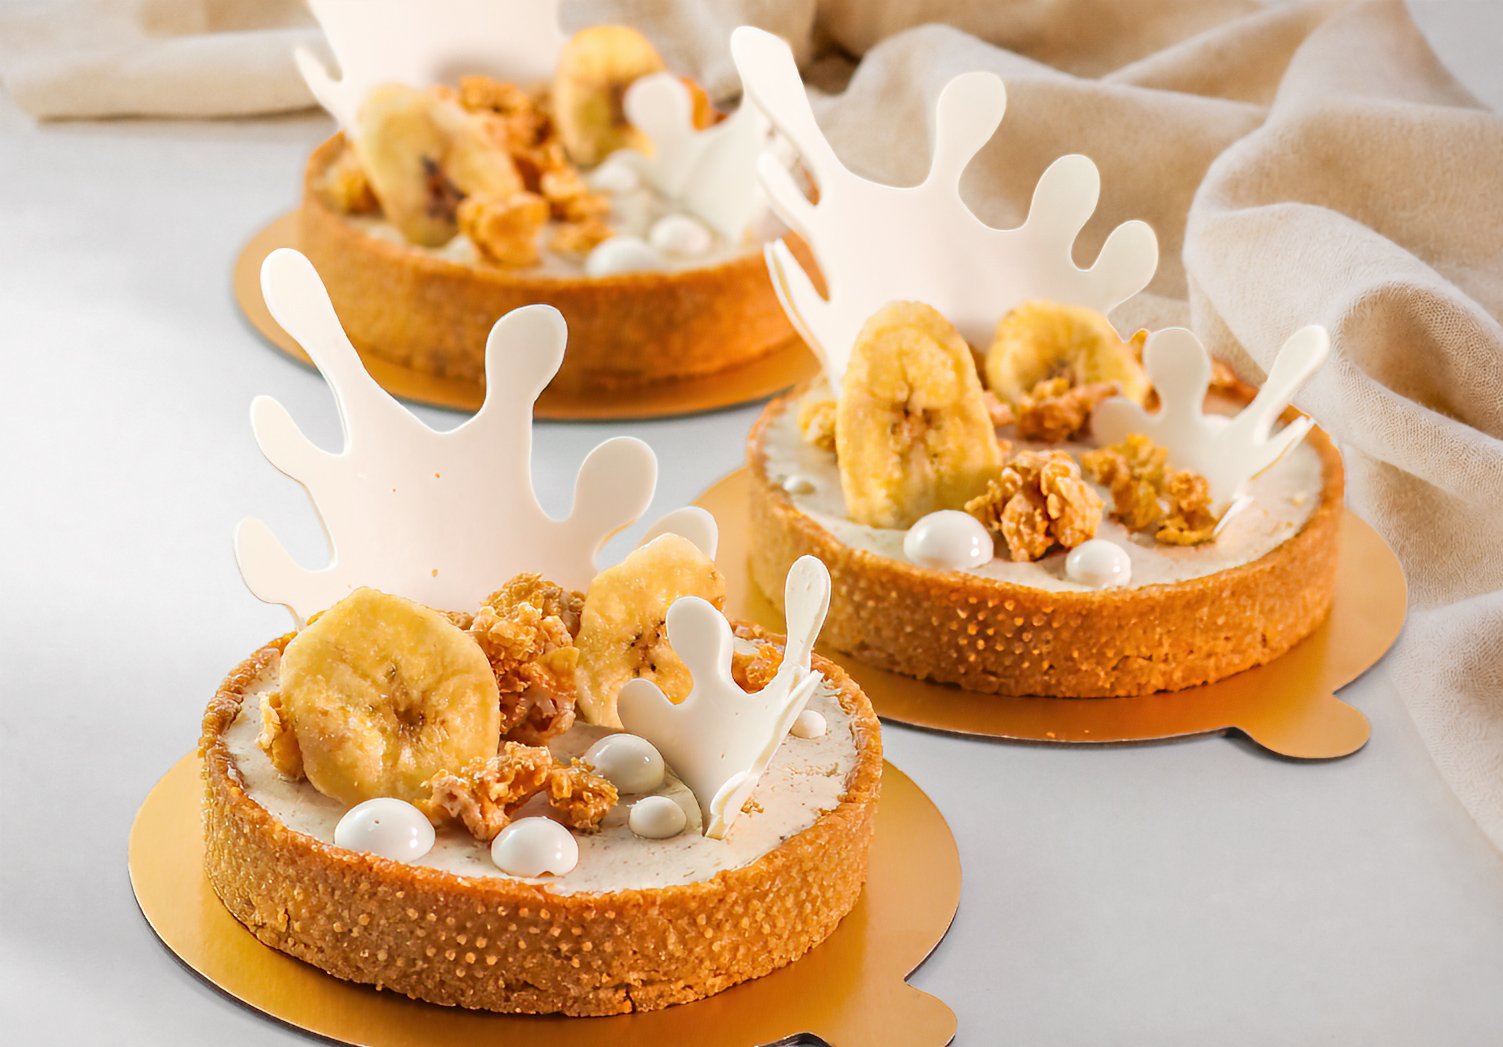
Leftover mousse has never been handled less efficiently.
These tarts started with extra banana cereal-milk mousse from another dessert project and a refusal to let it languish in a sad little Tupperware container. A little extra effort turned that leftover mousse into this recipe, and honestly? It was worth every bit of it. Mousse is fancy. It deserved a proper second act.
I wanted that second act to capture a whole bowl of cereal in one bite: the first crisp, toasty spoonful and the sweet, milky last one. So I rolled and cut a cornflake-studded malted crust, filled it with roasted-banana cereal-milk mousse, and added malted caramel cornflake clusters for a second round of crunch.
Then came banana chips, tiny milk bubbles, and gravity-defying splashes, all made from white chocolate. By that point, “using up the mousse” was less of a plan and more of a technicality.
Not bad for leftovers.
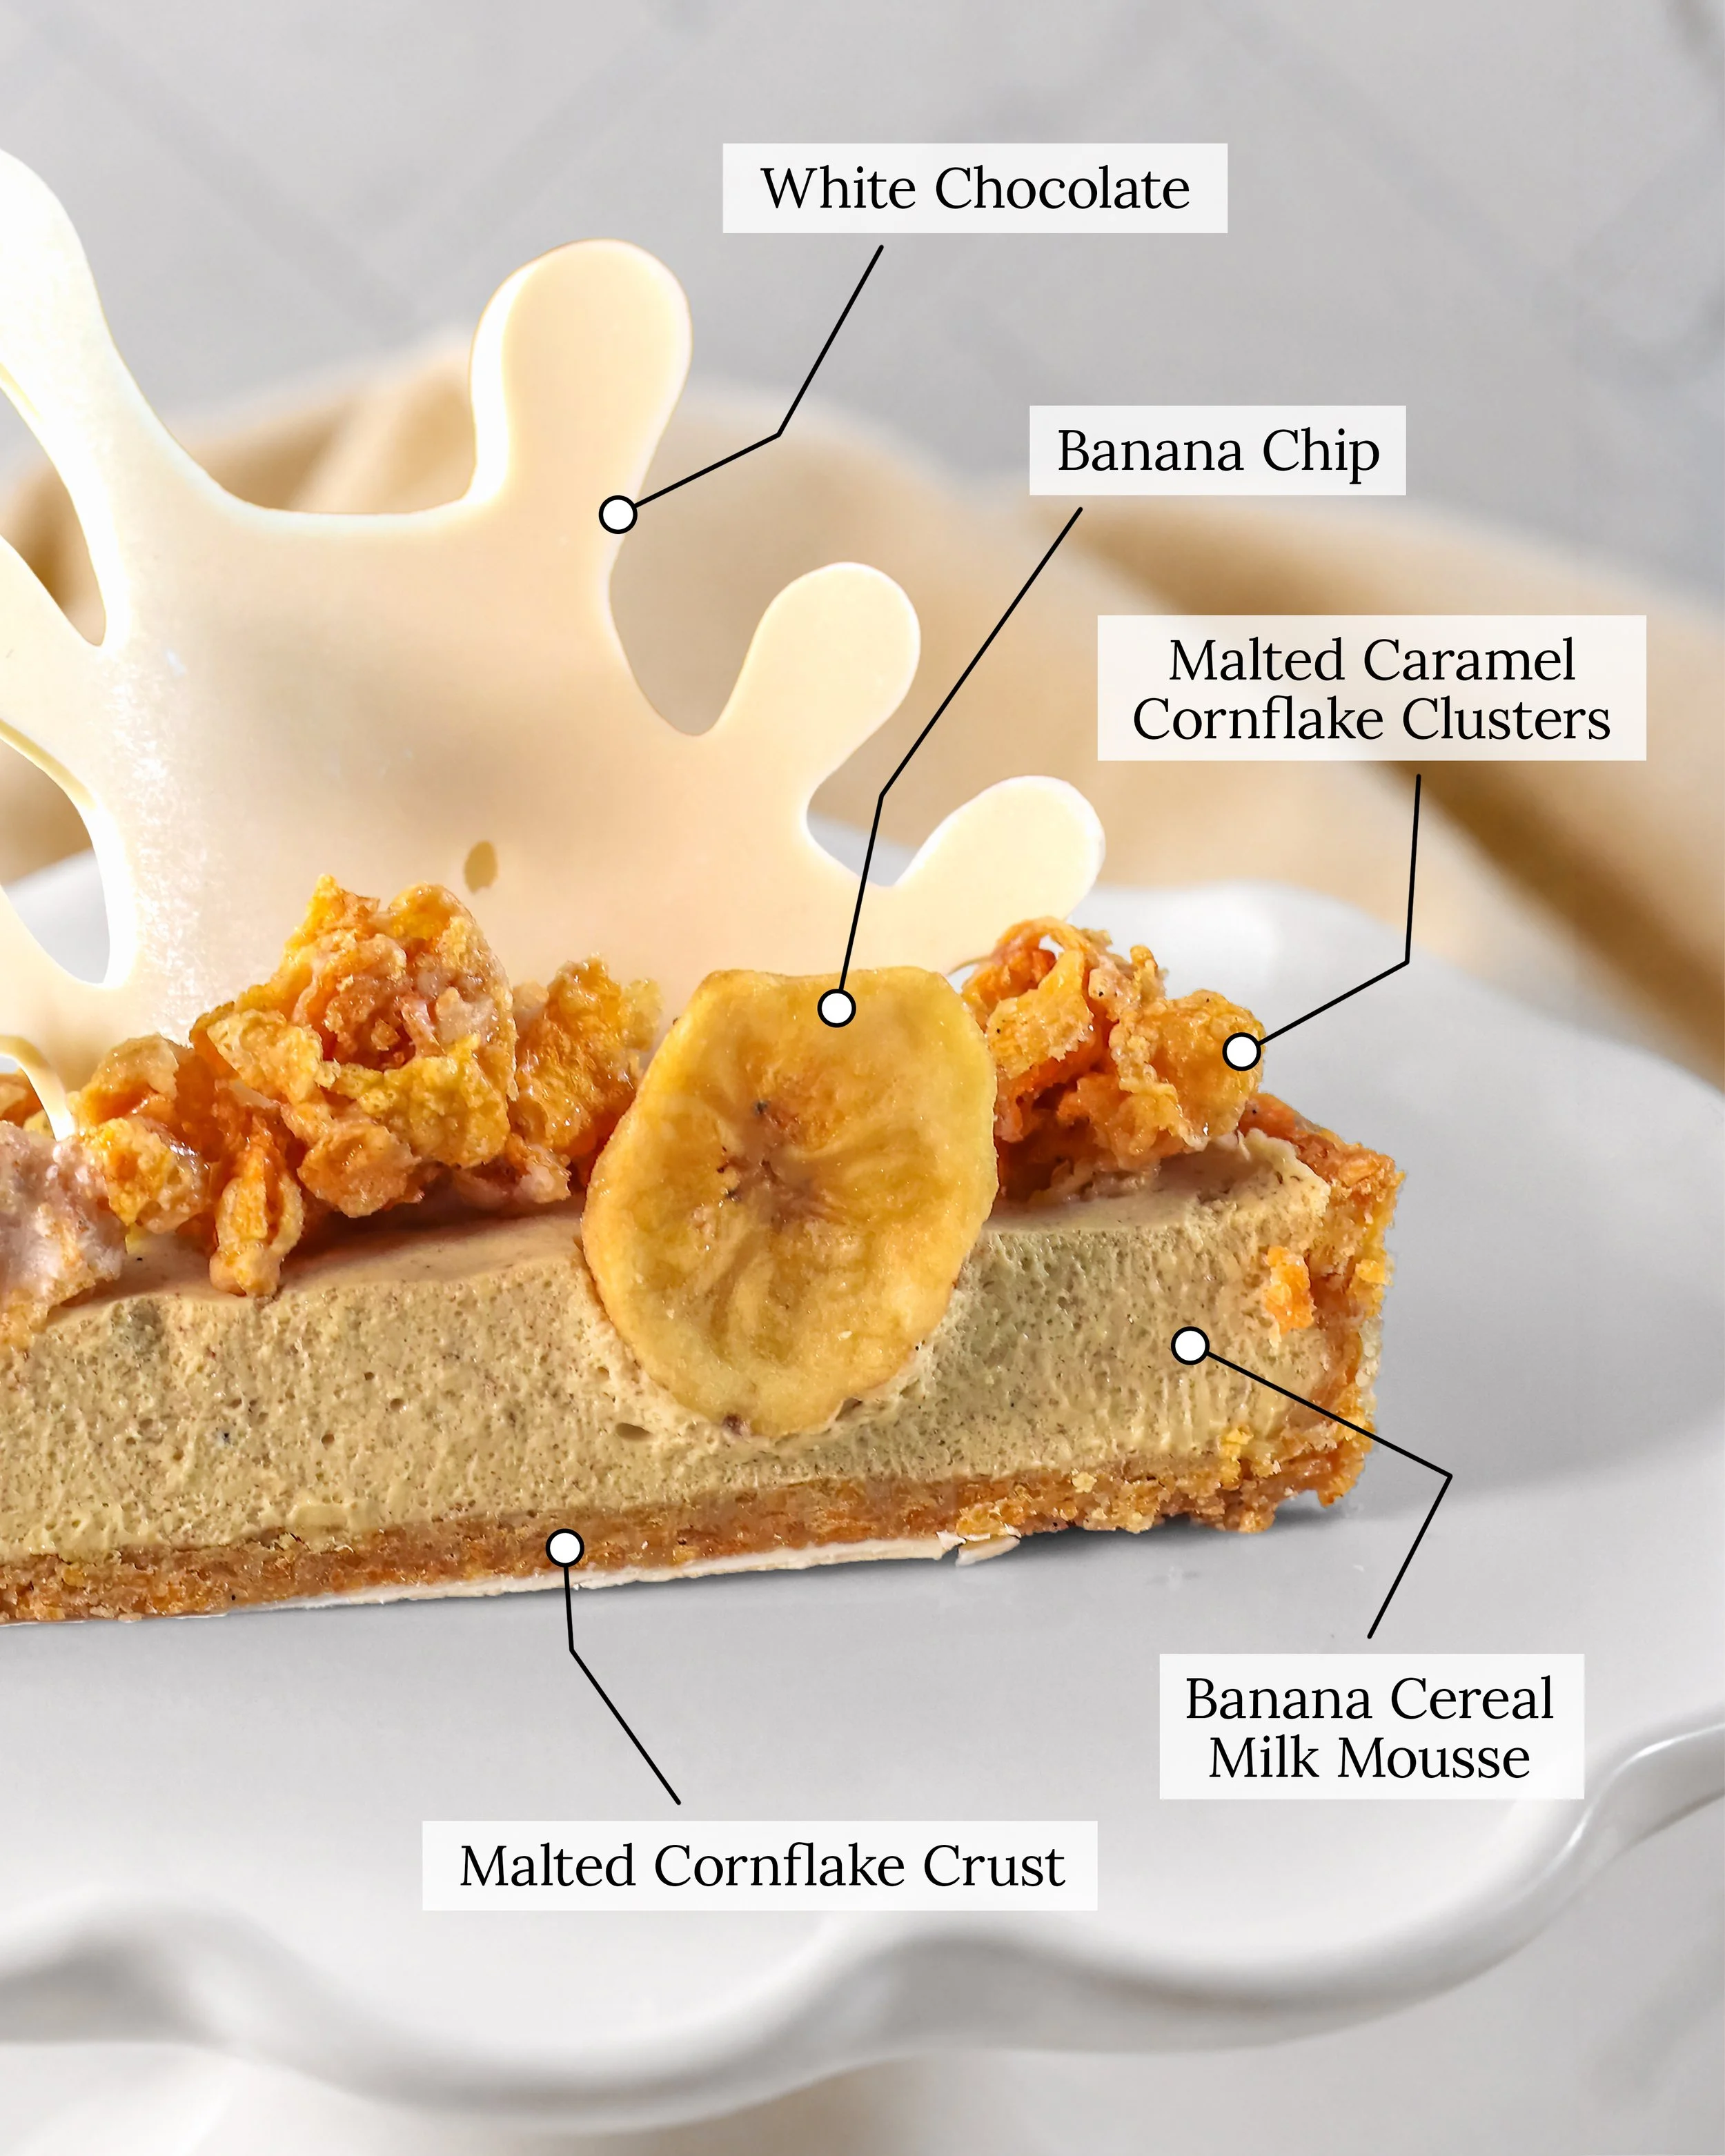
What are Saturday Morning Cereal Tarts?
These 4-inch tartlets put cornflakes to work three different ways: ground into the rolled malted crust, steeped into the milk for the mousse, and caramelized into crisp clusters for the top.
The crust is shaped and baked like classic tart pastry, while the mousse sets right inside the shells. No silicone molds or frozen-entremet gymnastics required. The white-chocolate splashes and bubbles are technically optional, but they do a lot for the Saturday-morning drama.
Prefer a printer-friendly version?
Use the links below to download the complete recipe and the printable white-chocolate milk-splash templates.
Recipe Overview
Yield: 6 individual 4-inch tarts, with a little extra mousse and a few bonus cornflake clusters for happy snacking
Timing: Best prepared over 2 days
Best enjoyed: The day they are decorated, while the tart shells and caramel cornflake clusters are at their crispest
Storage: Keep the mousse-filled tarts covered and refrigerated. Store the cornflake clusters separately at room temperature in a truly airtight container, then add them shortly before serving.
Components
Cornflake-studded malted tart shells
Banana malt cereal-milk mousse
Malted caramel cornflake clusters
White-chocolate milk splashes and bubbles
Banana chips
Equipment
Six 4-inch tart rings
Digital scale (a micro-scale is helpful for the smaller measurements)
Food processor
Rolling pin and rolling guides, optional
Sheet pans
Silicone baking mats or parchment paper
Stand mixer or hand mixer
Small saucepan
Thermometer
Immersion blender
Piping bags
Small offset spatula
Pastry brush for sealing the baked shells
Acetate or parchment for the white-chocolate decorations
White-chocolate milk-splash template, optional
Small hemisphere molds for the milk bubbles, optional
Rigid airtight container and food-safe desiccant packet for the cornflake clusters
Suggested Production Schedule
These tarts are happiest as a two-day project. The white-chocolate decorations and caramel cornflake clusters can also be made before Day 1 if you’d like to spread out the work.
Day 1: Crust, Crunch, and Mousse
Make the white-chocolate milk splashes and optional milk bubbles. Let them set completely, then store them in a cool, dry place.
Make the malted caramel cornflake clusters. Once their cocoa-butter coating has fully crystallized, pack them in a rigid airtight container with a food-safe desiccant packet. Do not refrigerate.
Make the cornflake-studded malted tart dough. Roll, cut, and line six 4-inch tart rings, then chill and bake the shells.
Cool the tart shells completely. Brush the interiors with a thin, complete layer of tempered white chocolate or precrystallized cocoa butter. Let the seal fully crystallize before adding the mousse.
Prepare the toasted cereal milk and roasted banana purée.
Make the banana malt cereal-milk mousse, pipe it into the prepared shells, and smooth the tops.
Cover the tarts and refrigerate for at least 6 hours, preferably overnight.
Day 2: Decorate and Serve
Arrange the white-chocolate milk splashes, milk bubbles, and banana chips on the chilled tarts.
Add the malted caramel cornflake clusters as close to serving as possible (especially humid weather).
Keep the finished tarts refrigerated until serving.
Cornflake-Malt Tart Shells
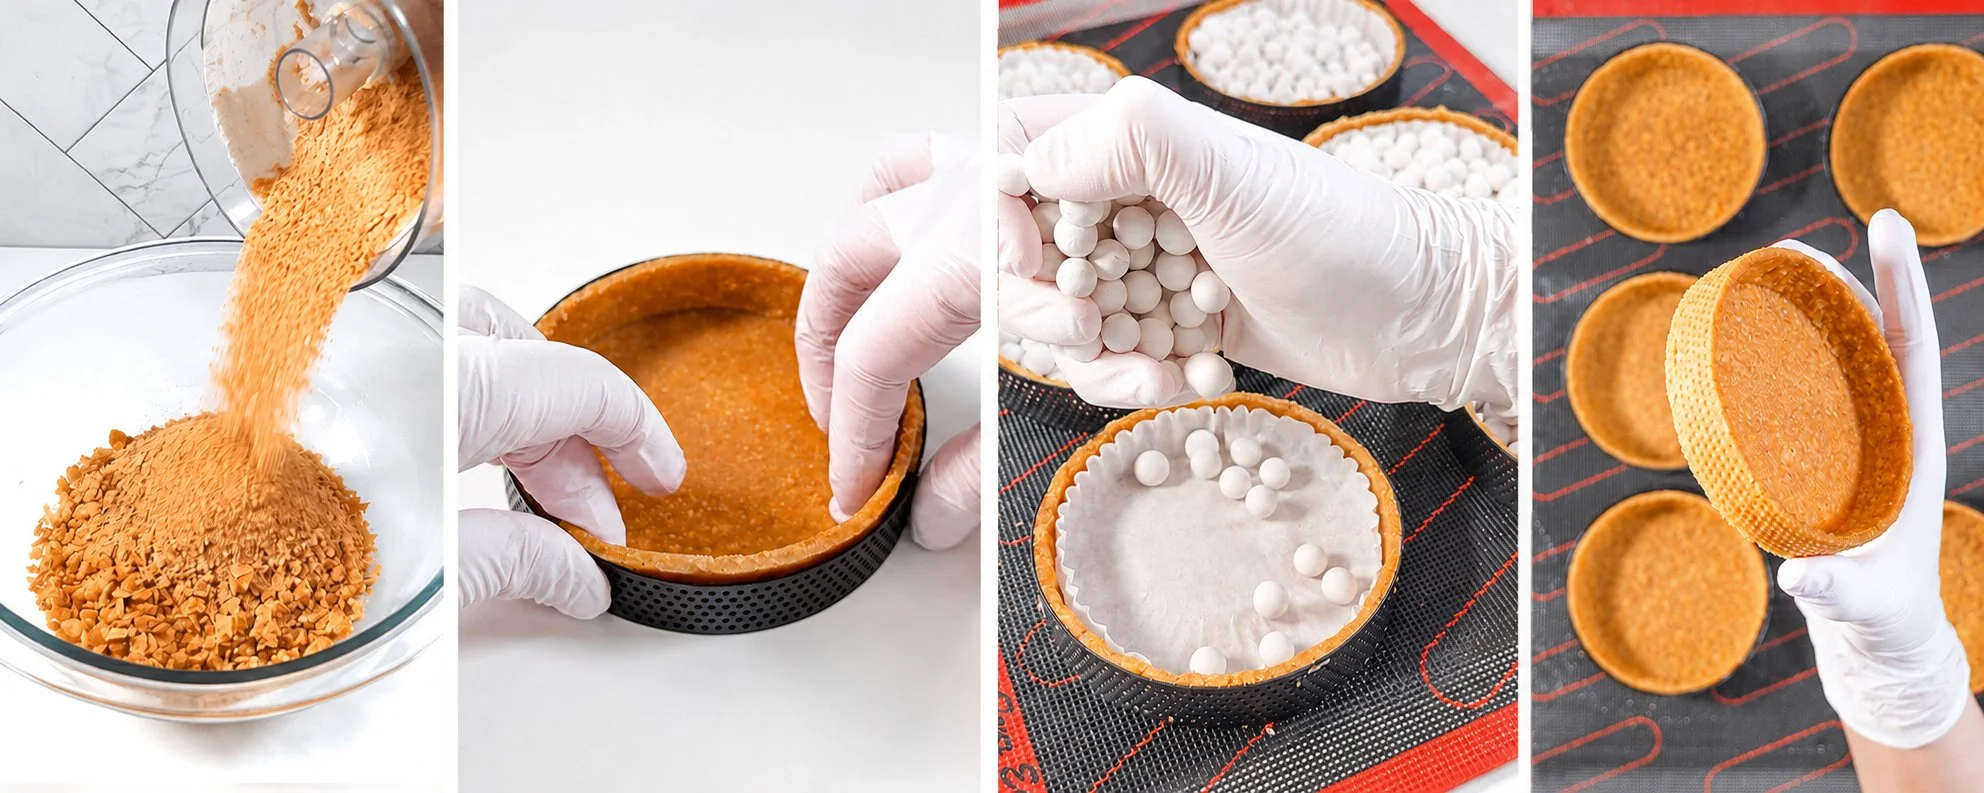
These tart shells borrow the clean structure of classic rolled pastry, then load it with toasted cornflakes and malt. The result is salty, buttery, and crisp, with enough cereal flavor to make the theme obvious before the mousse even shows up.
The cornflakes are divided between a fine meal and small visible flakes. Rolling the dough between parchment and chilling it before cutting gives the shells clean sides while keeping a subtle cereal-speckled finish.
Yield: 6 individual 4-inch tart shells
Ingredients
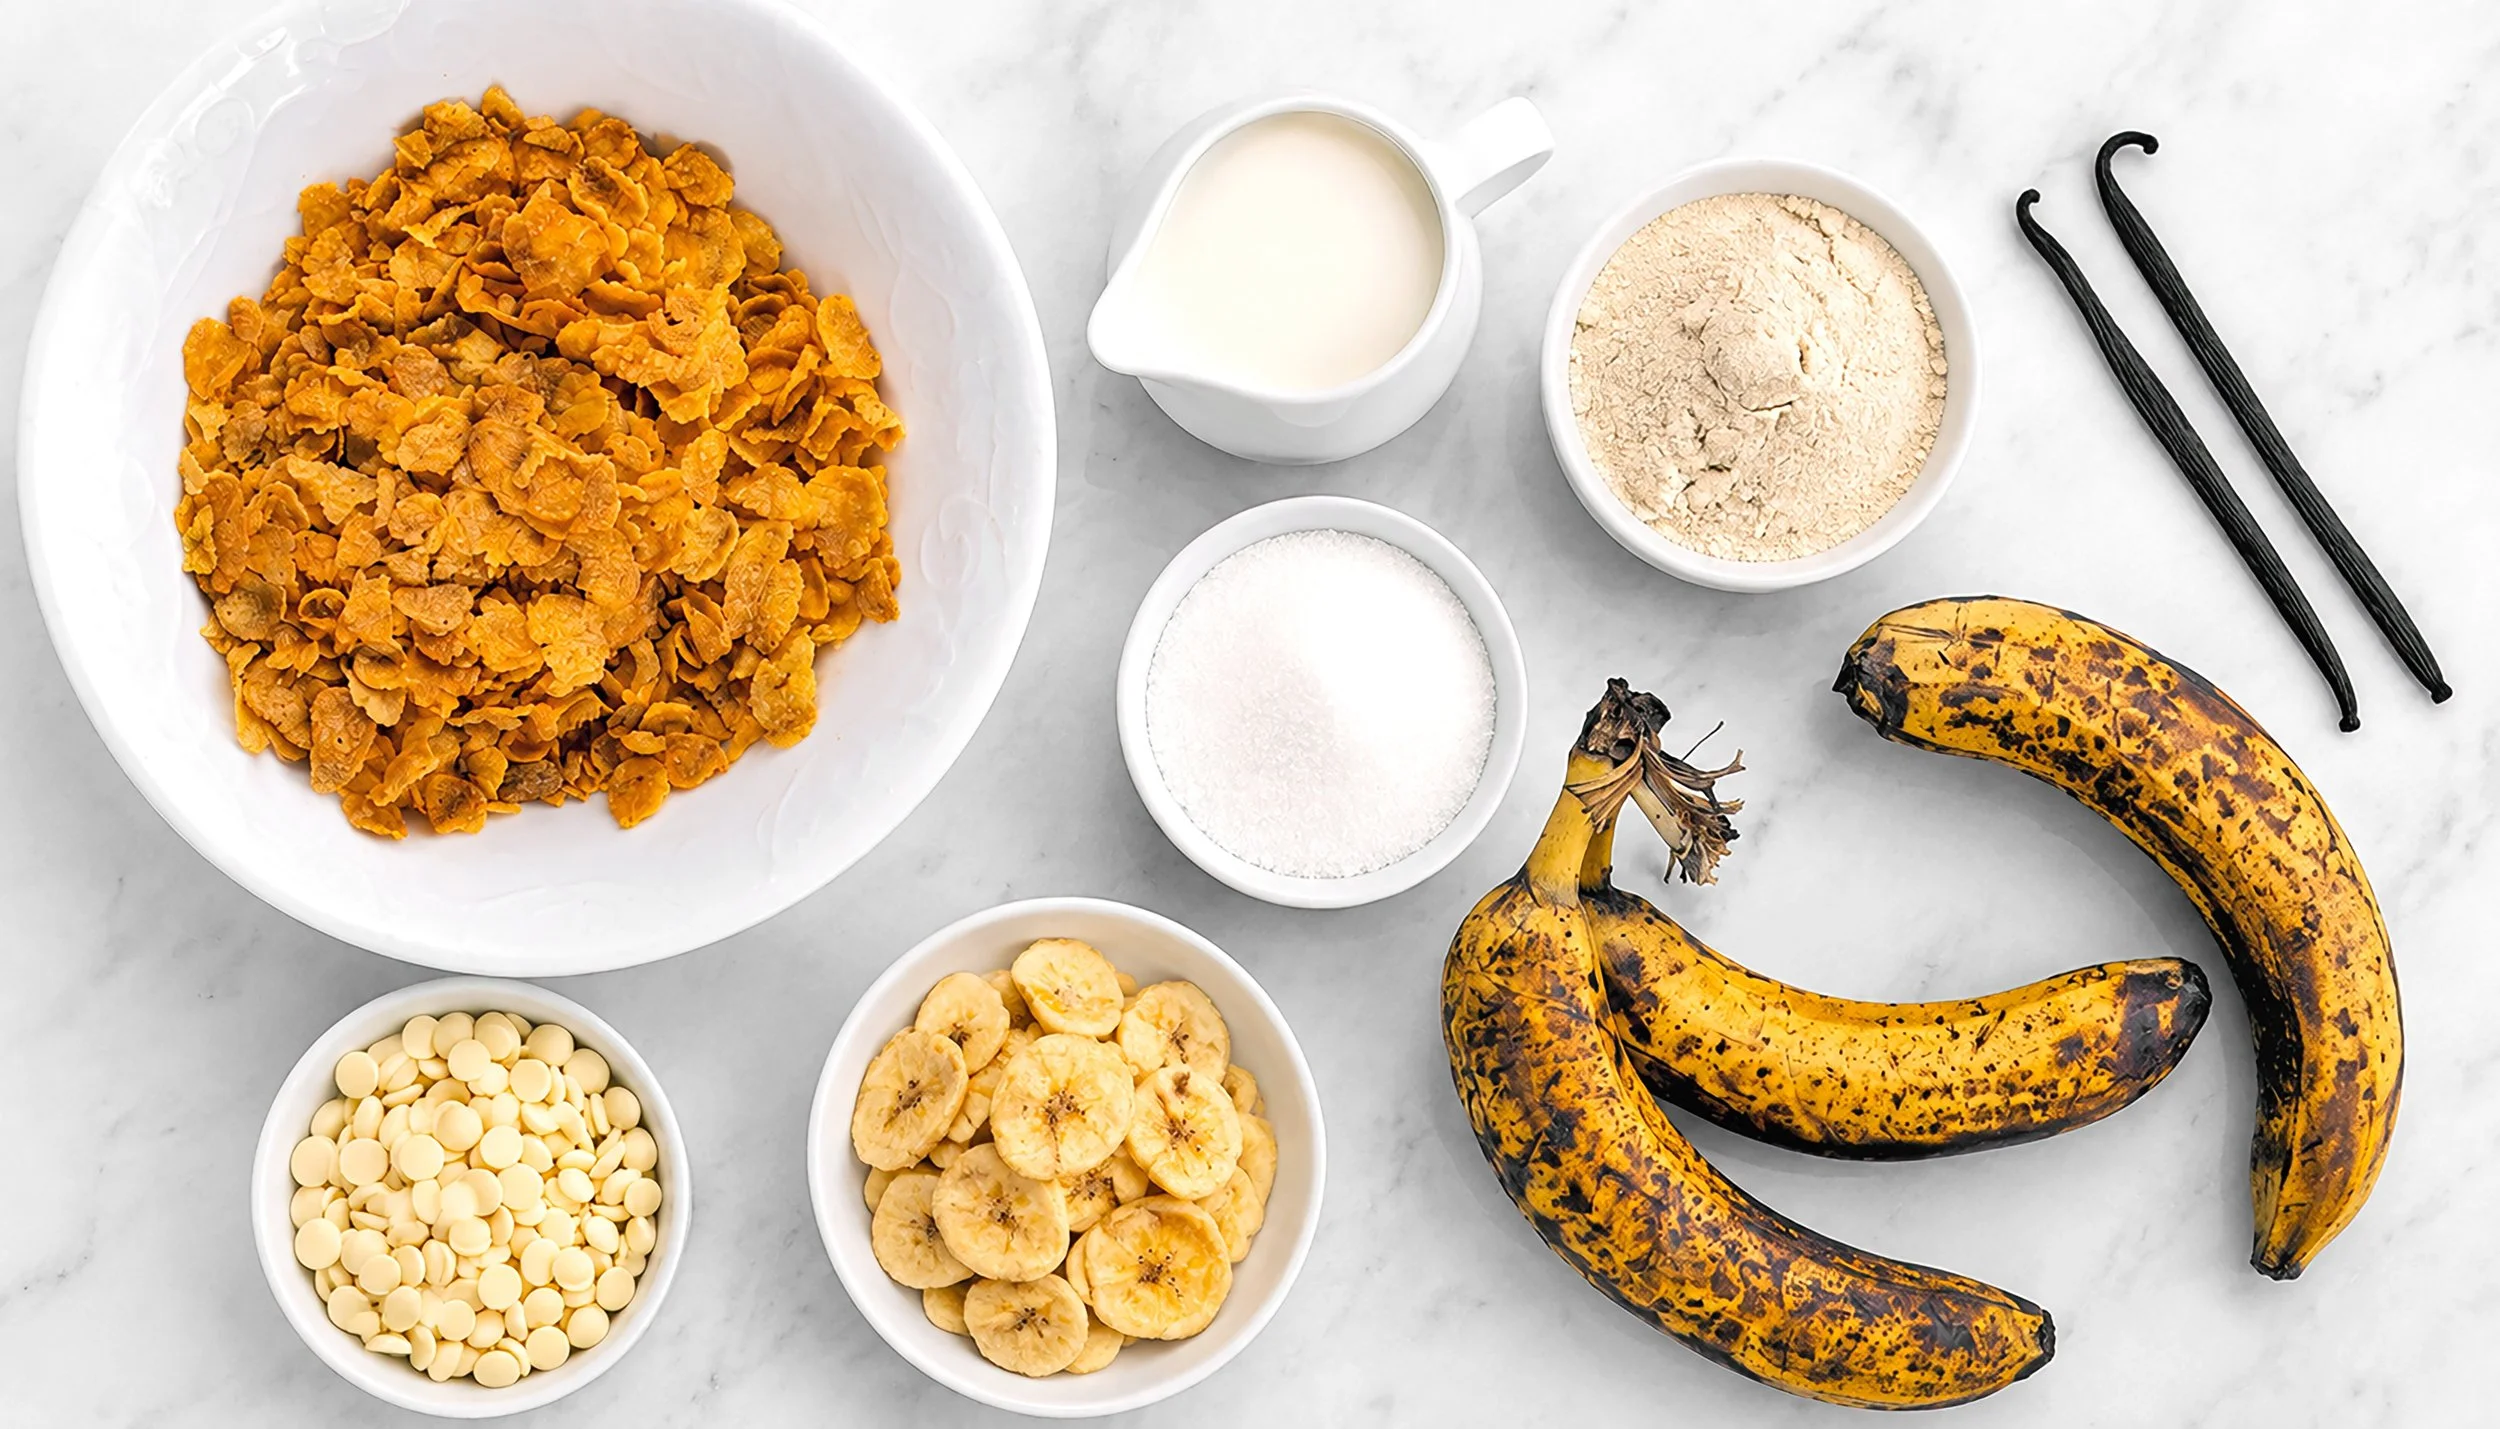
120 g plain cornflakes
70 g all-purpose flour
20 g non-diastatic malted milk powder
20 g light brown sugar
15 g granulated sugar
2.5 g fine sea salt
90 g unsalted butter, melted and cooled to 30–35°C / 86–95°F
35 g egg white
2 g vanilla bean paste or vanilla extract
Tempered white chocolate or precrystallized cocoa butter, as needed for sealing
Method
Arrange the tart rings on a flat silicone baking mat or parchment-lined sheet pan.
Heat the oven to 160°C / 320°F. Toast the cornflakes for 7–9 minutes, then cool completely.
Grind 95 g of the toasted cornflakes into a fine meal and crush the remaining 25 g into small flakes, approximately 2–4 mm. Combine both with the flour, malted milk powder, sugars, and salt.
Whisk the melted and cooled butter with the egg white and vanilla until homogeneous. Add it to the dry ingredients and mix until evenly combined. Rest the dough for 5–8 minutes, then chill briefly, just until firm enough to roll without smearing.
Roll the dough between two sheets of parchment to approximately 4 mm thick. Chill until firm, about 25 minutes in the refrigerator or 10–12 minutes in the freezer.
Cut six circles to fit the bottoms of the tart rings, then cut strips as tall as the rings and long enough to line the inner walls. Place a circle in each ring and fit a strip snugly around the inside. Trim the ends to meet, then gently press the side seam and bottom edge together to seal. Chill until completely firm. For extra shape support, line each shell with a cupcake liner and fill with pie weights before baking (optional).
Bake at 160°C / 320°F in a convection oven or 175°C / 350°F in a conventional oven. Once the shells are firm enough to hold their shape, carefully remove the liners and weights, then continue baking until evenly golden and crisp, 16–20 minutes total.
If the bases develop any high spots, lightly flatten only those areas while the shells are still warm and the rings are in place. Cool completely before carefully removing the rings.
Brush the bases and interior walls with a very thin but complete layer of tempered white chocolate or cocoa butter. Let the coating crystallize fully before adding the mousse.
Notes
The finished shells should be crisp and short, with a fine cereal grain and subtle flecks of cornflake throughout.
For the moisture seal, completeness matters more than thickness. Keep the coating nearly invisible, but do not leave any bare spots. Even a tiny gap gives the mousse moisture a convenient entrance.
White chocolate is easier to see as you brush and adds a little sweetness. Cocoa butter has a more neutral flavor and leaves an almost invisible finish.
Troubleshooting
The dough is too soft to roll: Chill it a little longer. The butter should be firm enough to prevent smearing, but the dough should still be flexible.
The chilled dough cracks while cutting or lining: Let it sit at room temperature for a minute or two, then try again. It is slightly too cold.
Banana Malt Cereal-Milk Mousse
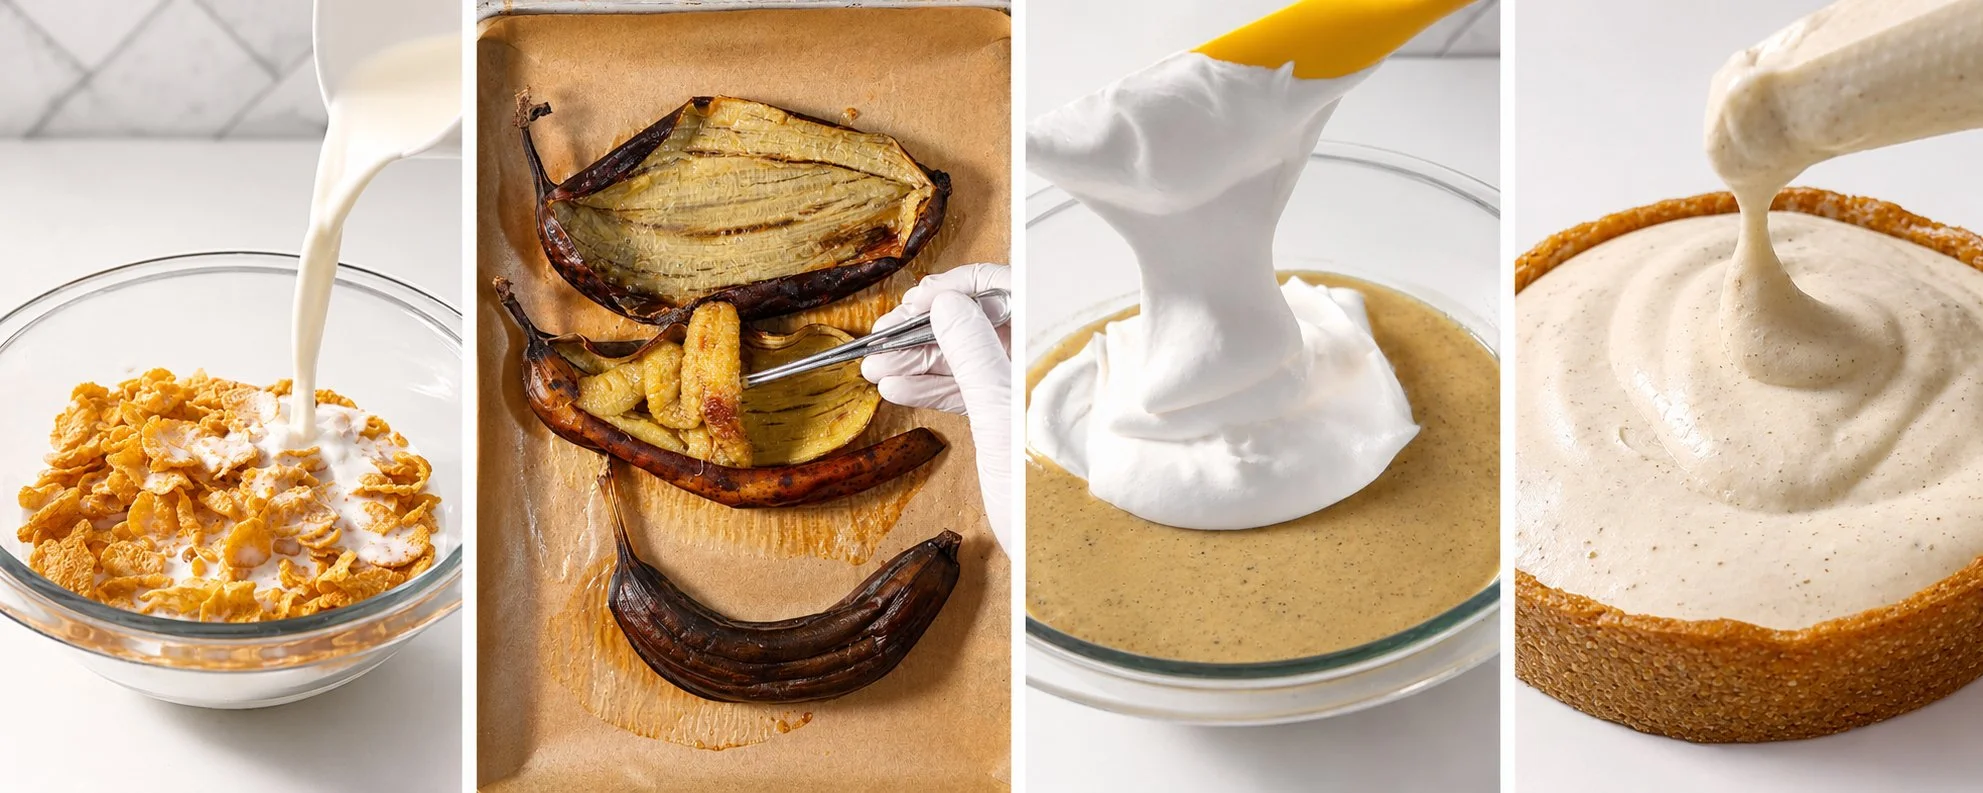
The goal here is banana cereal milk, not banana pudding with a few cornflakes thrown in. Roasting the bananas concentrates their flavor, while toasted cereal milk, malted milk powder, and freeze-dried banana powder keep everything tasting full and recognizable after the cream is folded in.
The finished mousse is silky and pillowy once chilled, but structured enough to slice cleanly inside the tart shells.
Yield: Approximately 835 g mousse, enough to fill six 4-inch tart shells with some left over
Ingredients
Toasted Cereal Milk
69 g plain cornflakes
345 g whole milk
165 g strained toasted cereal milk will be used in the mousse
Banana Malt Mousse
180 g roasted, concentrated banana purée
10 g freeze-dried banana powder
18 g non-diastatic malted milk powder
115 g white chocolate, 30–35%, melted
6.5 g powdered gelatin, 200 Bloom
32.5 g cold water
300 g cold heavy cream, 35–36%
3 g vanilla bean paste or vanilla extract
3 g lemon or yuzu juice
1.8 g fine sea salt
Optional: Banana emulsion
Method
Toast the cornflakes at 160°C / 320°F for 7–9 minutes, then cool completely. Pour the whole milk over the toasted cereal and steep for exactly 20 minutes. Strain gently without crushing or aggressively squeezing the cornflakes. Weigh 165 g of the finished cereal milk for the mousse.
Roast very ripe, unpeeled bananas at 175°C / 350°F for 18–25 minutes, until the skins are nearly black and the fruit is completely soft. Some bananas may split and leak juice, so capture all of it. Scoop out the flesh, add the juices, and blend until smooth. If the purée is watery, reduce it gently until glossy and jammy. Weigh 180 g.
Bloom the gelatin in the cold water for 10–15 minutes. Melt the white chocolate to 40–45°C / 104–113°F.
Combine the cereal milk, banana purée, banana powder, malted milk powder, vanilla, and salt. Heat to 60–65°C / 140–149°F and blend until completely smooth. Do not boil.
Add the bloomed gelatin and blend until fully dissolved. Pour the warm mixture over the melted white chocolate in three additions, stirring from the center after each addition to create a smooth, elastic emulsion. Finish with an immersion blender, keeping the head submerged to avoid incorporating air.
When the base reaches 38–40°C / 100–104°F, blend in the lemon or yuzu juice. Cool the base to 32–34°C / 90–93°F.
Whip the cold heavy cream to soft-medium peaks. Whisk one-third of the whipped cream into the mousse base, then gently fold in the remainder in two additions.
Pipe the mousse immediately into the prepared tart shells and smooth the tops. Cover and refrigerate for at least 6 hours, preferably overnight.
Notes
Before folding in the whipped cream, the mousse base should taste slightly more banana-forward, saltier, and brighter than you want the finished mousse to taste. Chilling, dairy fat, and aeration will soften the flavor. If too light, add banana emulsion to taste.
Reduce the roasted banana purée only if it is visibly watery. The goal is a glossy, concentrated purée, not a heavily cooked banana paste.
Keep an eye on the temperature before folding. A base that is too warm can melt the whipped cream; one that is too cool may begin setting before the cream is fully incorporated.
Malted Caramel Cornflake Clusters
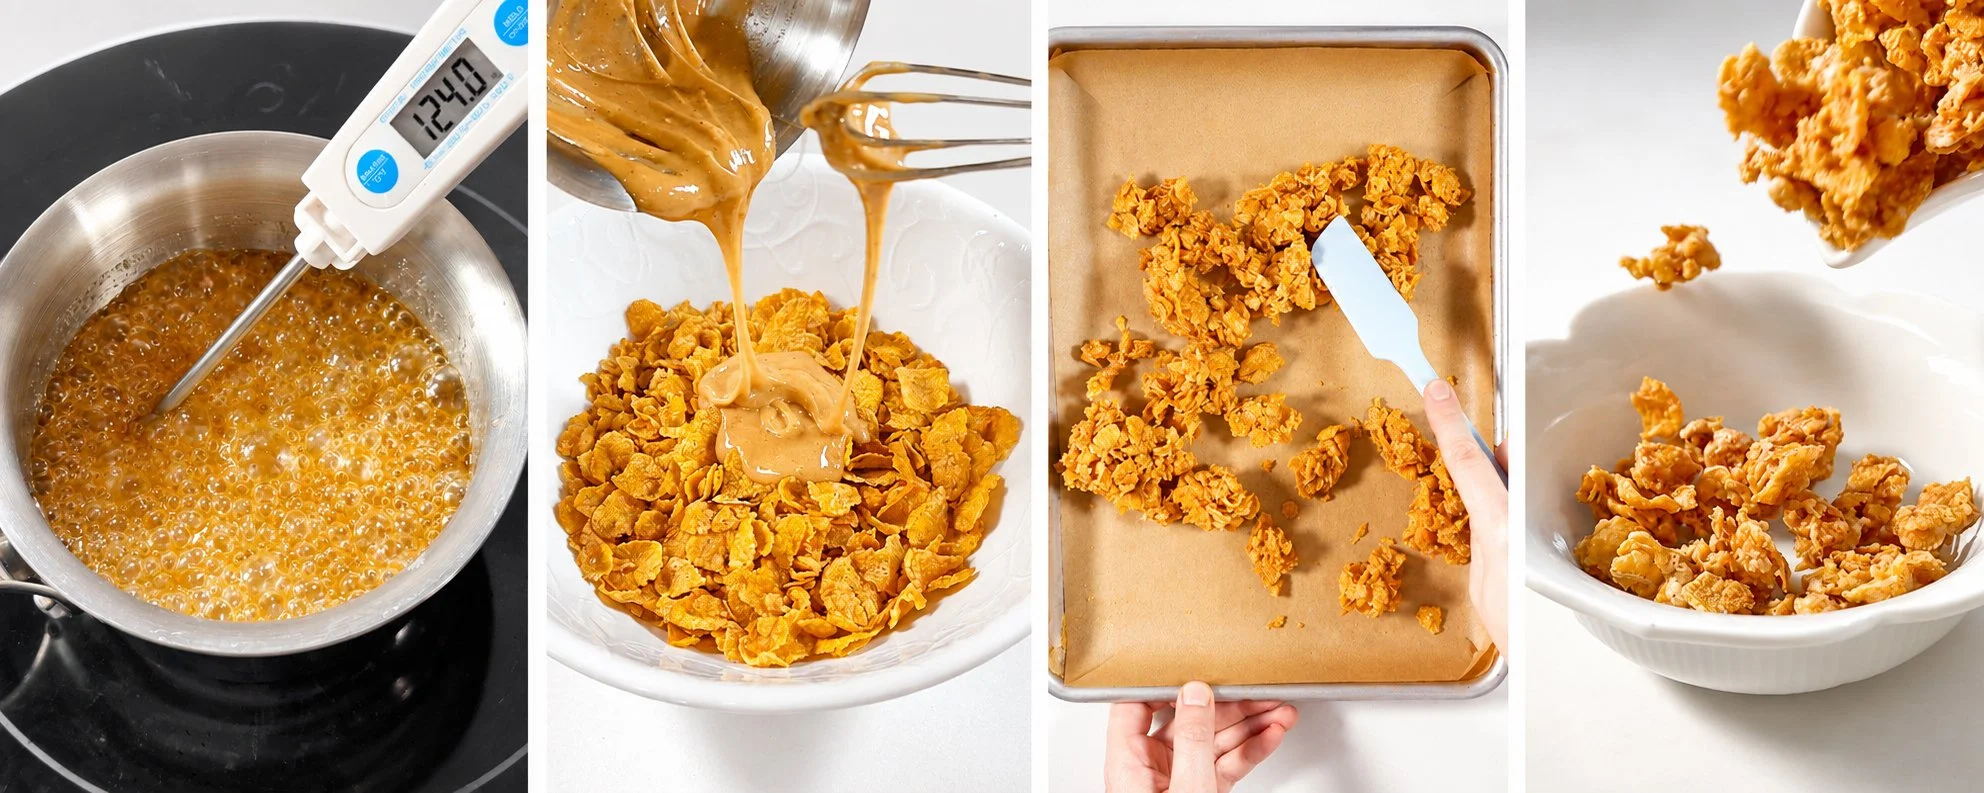
These clusters represent the crispy flakes that refused to surrender. They have a toasted, almost nougaty flavor and a light caramel snap. Several will probably not make it to assembly.
The low oven removes lingering moisture from the caramel, while a thin cocoa-butter coating adds extra protection against humidity. This is especially helpful if your kitchen also believes summer should happen indoors.
Yield: Approximately 400–420 g, more than enough for six tarts with lots of extra clusters for snacking
Ingredients
200 g plain cornflakes
80 g granulated sugar
32 g light brown sugar
32 g glucose syrup
28 g water
44 g unsalted butter
16 g non-diastatic malted milk powder
3 g fine sea salt
4 g vanilla bean paste or vanilla extract
1 g baking soda
Optional: 24 g deodorized cocoa butter
Method
Toast the cornflakes at 160°C / 320°F for 7–9 minutes. Crush about one-third of the flakes and leave the rest recognizable. Hold the cereal warm at approximately 60–75°C / 140–167°F in a large heatproof bowl.
Lower the oven to 95°C / 200°F. Sift the malted milk powder and measure the vanilla and baking soda separately so everything is ready before the caramel comes off the heat.
Combine both sugars, glucose syrup, water, butter, and salt in a saucepan. Stir only until evenly dissolved, then cook without further stirring to 123–125°C / 253–257°F.
Remove the caramel from the heat. Whisk in the malted milk powder and vanilla, then add the baking soda last. Whisk only until evenly aerated. Immediately pour the caramel over the warm cornflakes and fold quickly but gently until coated.
Spread the cereal in a loose, mostly single layer on a silicone- or parchment-lined sheet pan. Do not compress it into dense granola-like clusters. Bake for 45–60 minutes, turning and gently separating the cereal every 15 minutes.
Begin testing at 45 minutes. Cool a small piece for 2–3 minutes. It should snap cleanly and release easily from your teeth. If it bends, chews, or feels tacky, continue drying in 5–8 minute increments. Once crisp, turn off the oven and leave the tray inside for 10 minutes with the door slightly ajar.
Cool the clusters just until they are no longer warm. If needed for humidity-protection, temper the cocoa butter, then toss it gently through the clusters. Spread them apart and let the coating crystallize completely.
Pack the clusters immediately in a rigid, truly airtight container with a food-safe desiccant packet. Store them in the coolest air-conditioned room available. Do not refrigerate.
Troubleshooting
The clusters bend or stick to your teeth: They need more time in the low oven. Continue drying in short increments and test again after cooling.
The clusters are dense and hard: The cereal may have been compressed on the tray or folded too aggressively after adding the caramel.
The clusters become tacky during storage: They may have been packed while still warm, exposed to humidity, or sealed before the cocoa-butter coating fully crystallized.
White-Chocolate Milk Splashes and Bubbles
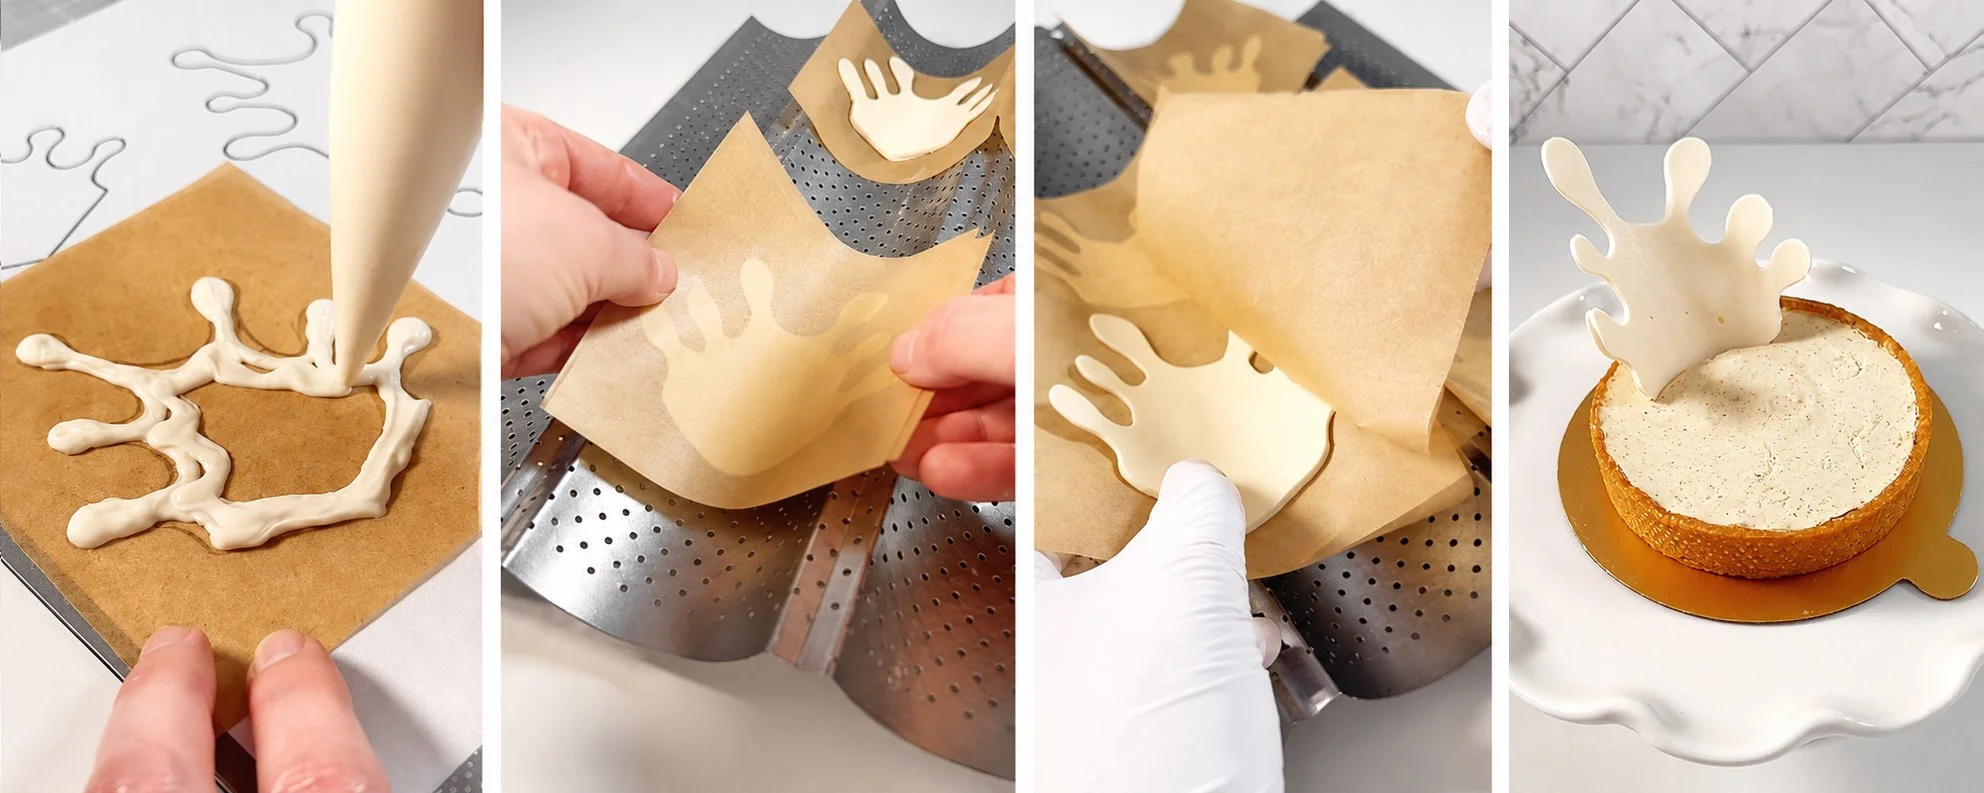
Milk stunt performed by white chocolate.
These decorations turn the finished tarts into a freeze-frame from a Saturday-morning cereal commercial. Tempered white chocolate gives the splashes the cleanest snap and finish, but white compound chocolate is a less challenging option if you would rather skip tempering.
Yield: 6 large milk splashes + 6 small milk splashes; bubbles as desired
Materials
Tempered white chocolate or melted white compound chocolate, as needed
Printed milk-splash templates
Parchment paper
Piping bag or small offset spatula
Baguette pan
Round cookie cutters, for the smaller splashes
White dragées or round white sprinkles in assorted sizes, optional
Method
Print the milk-splash templates and place them beneath squares of parchment paper.
Temper the white chocolate according to the manufacturer’s recommended temperatures. If using compound chocolate, melt it according to the package directions.
Trace the templates with the chocolate, keeping the splashes approximately 2–3 mm thick.
Cover each filled splash with another square of parchment paper and gently smooth or press the surface so the decorations have clean, flat sides.
Place the larger splashes over the grooves of a baguette pan so they set in a slight curve. To curve the smaller splashes, place them inside round cookie cutters before they set.
Make at least one or two extra splashes. The thinnest points are fragile, and backups are much more useful than optimism.
Allow the chocolate to set completely. Carefully remove the top parchment, then peel away the bottom parchment.
Once the mousse is fully chilled and set, insert the splashes into the tart. Arrange them with white dragées or round white sprinkles to create a loose, frothy-milk effect.
Notes
The handmade “bubbles” are optional. Assorted white dragées or round sprinkles will create a similar playful milk-bubble effect with significantly less shaping involved.